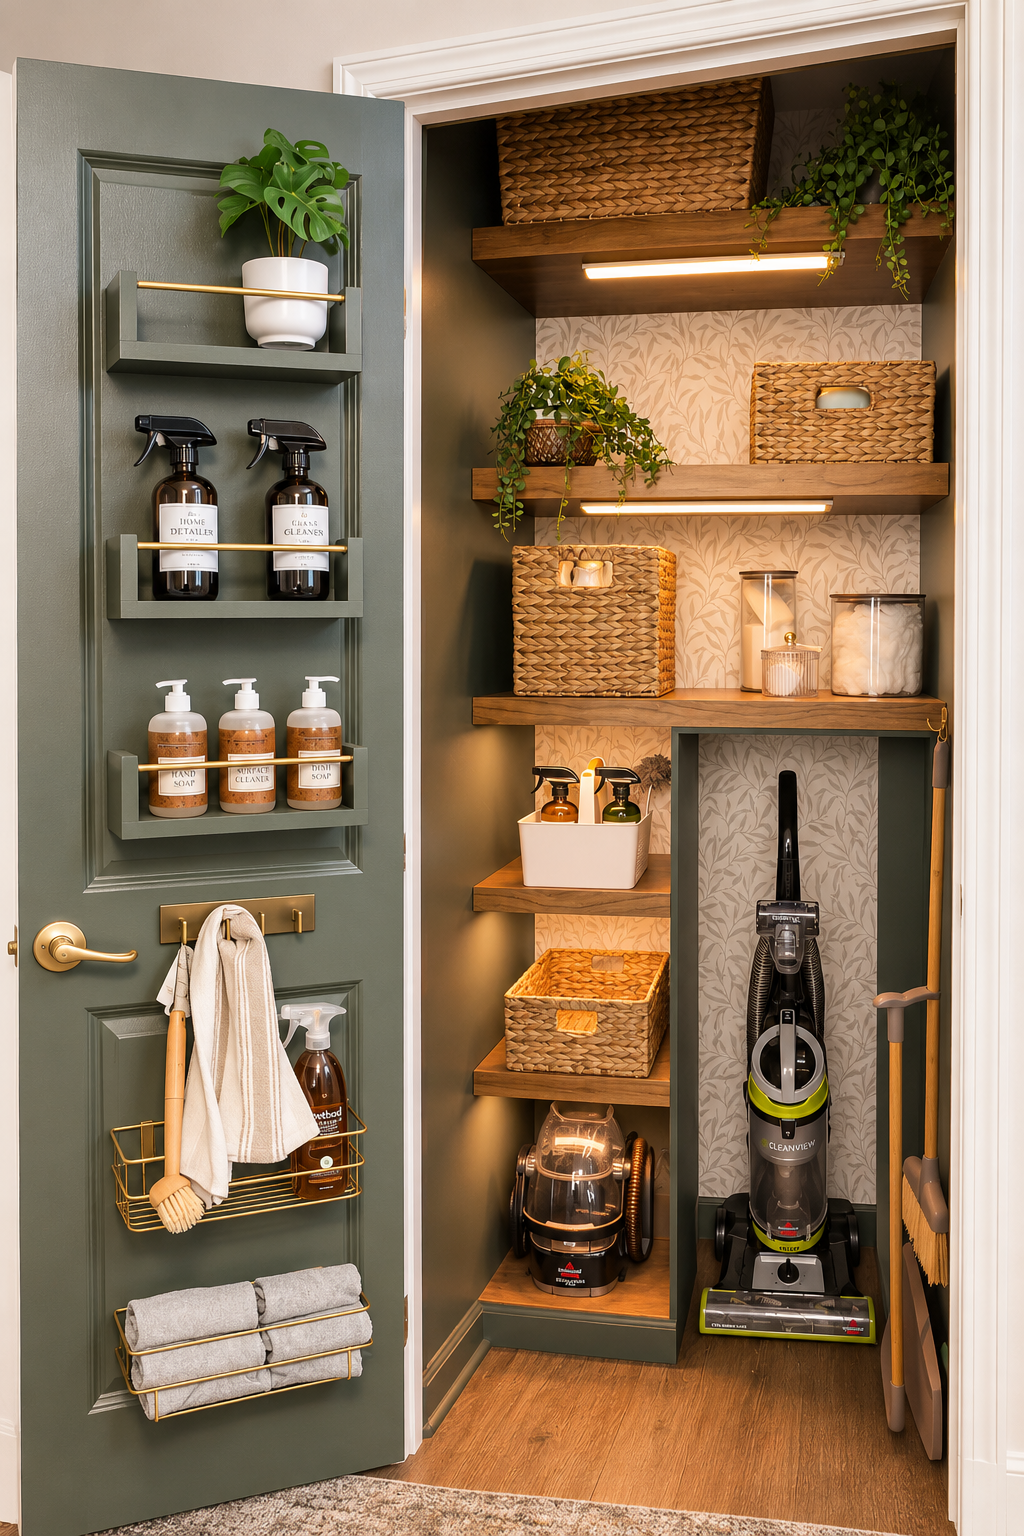
I don't know about you, but there is something SO satisfying about turning a small, overlooked space into something that's actually functional. And this little cleaning closet makeover might be one of my favorite examples!
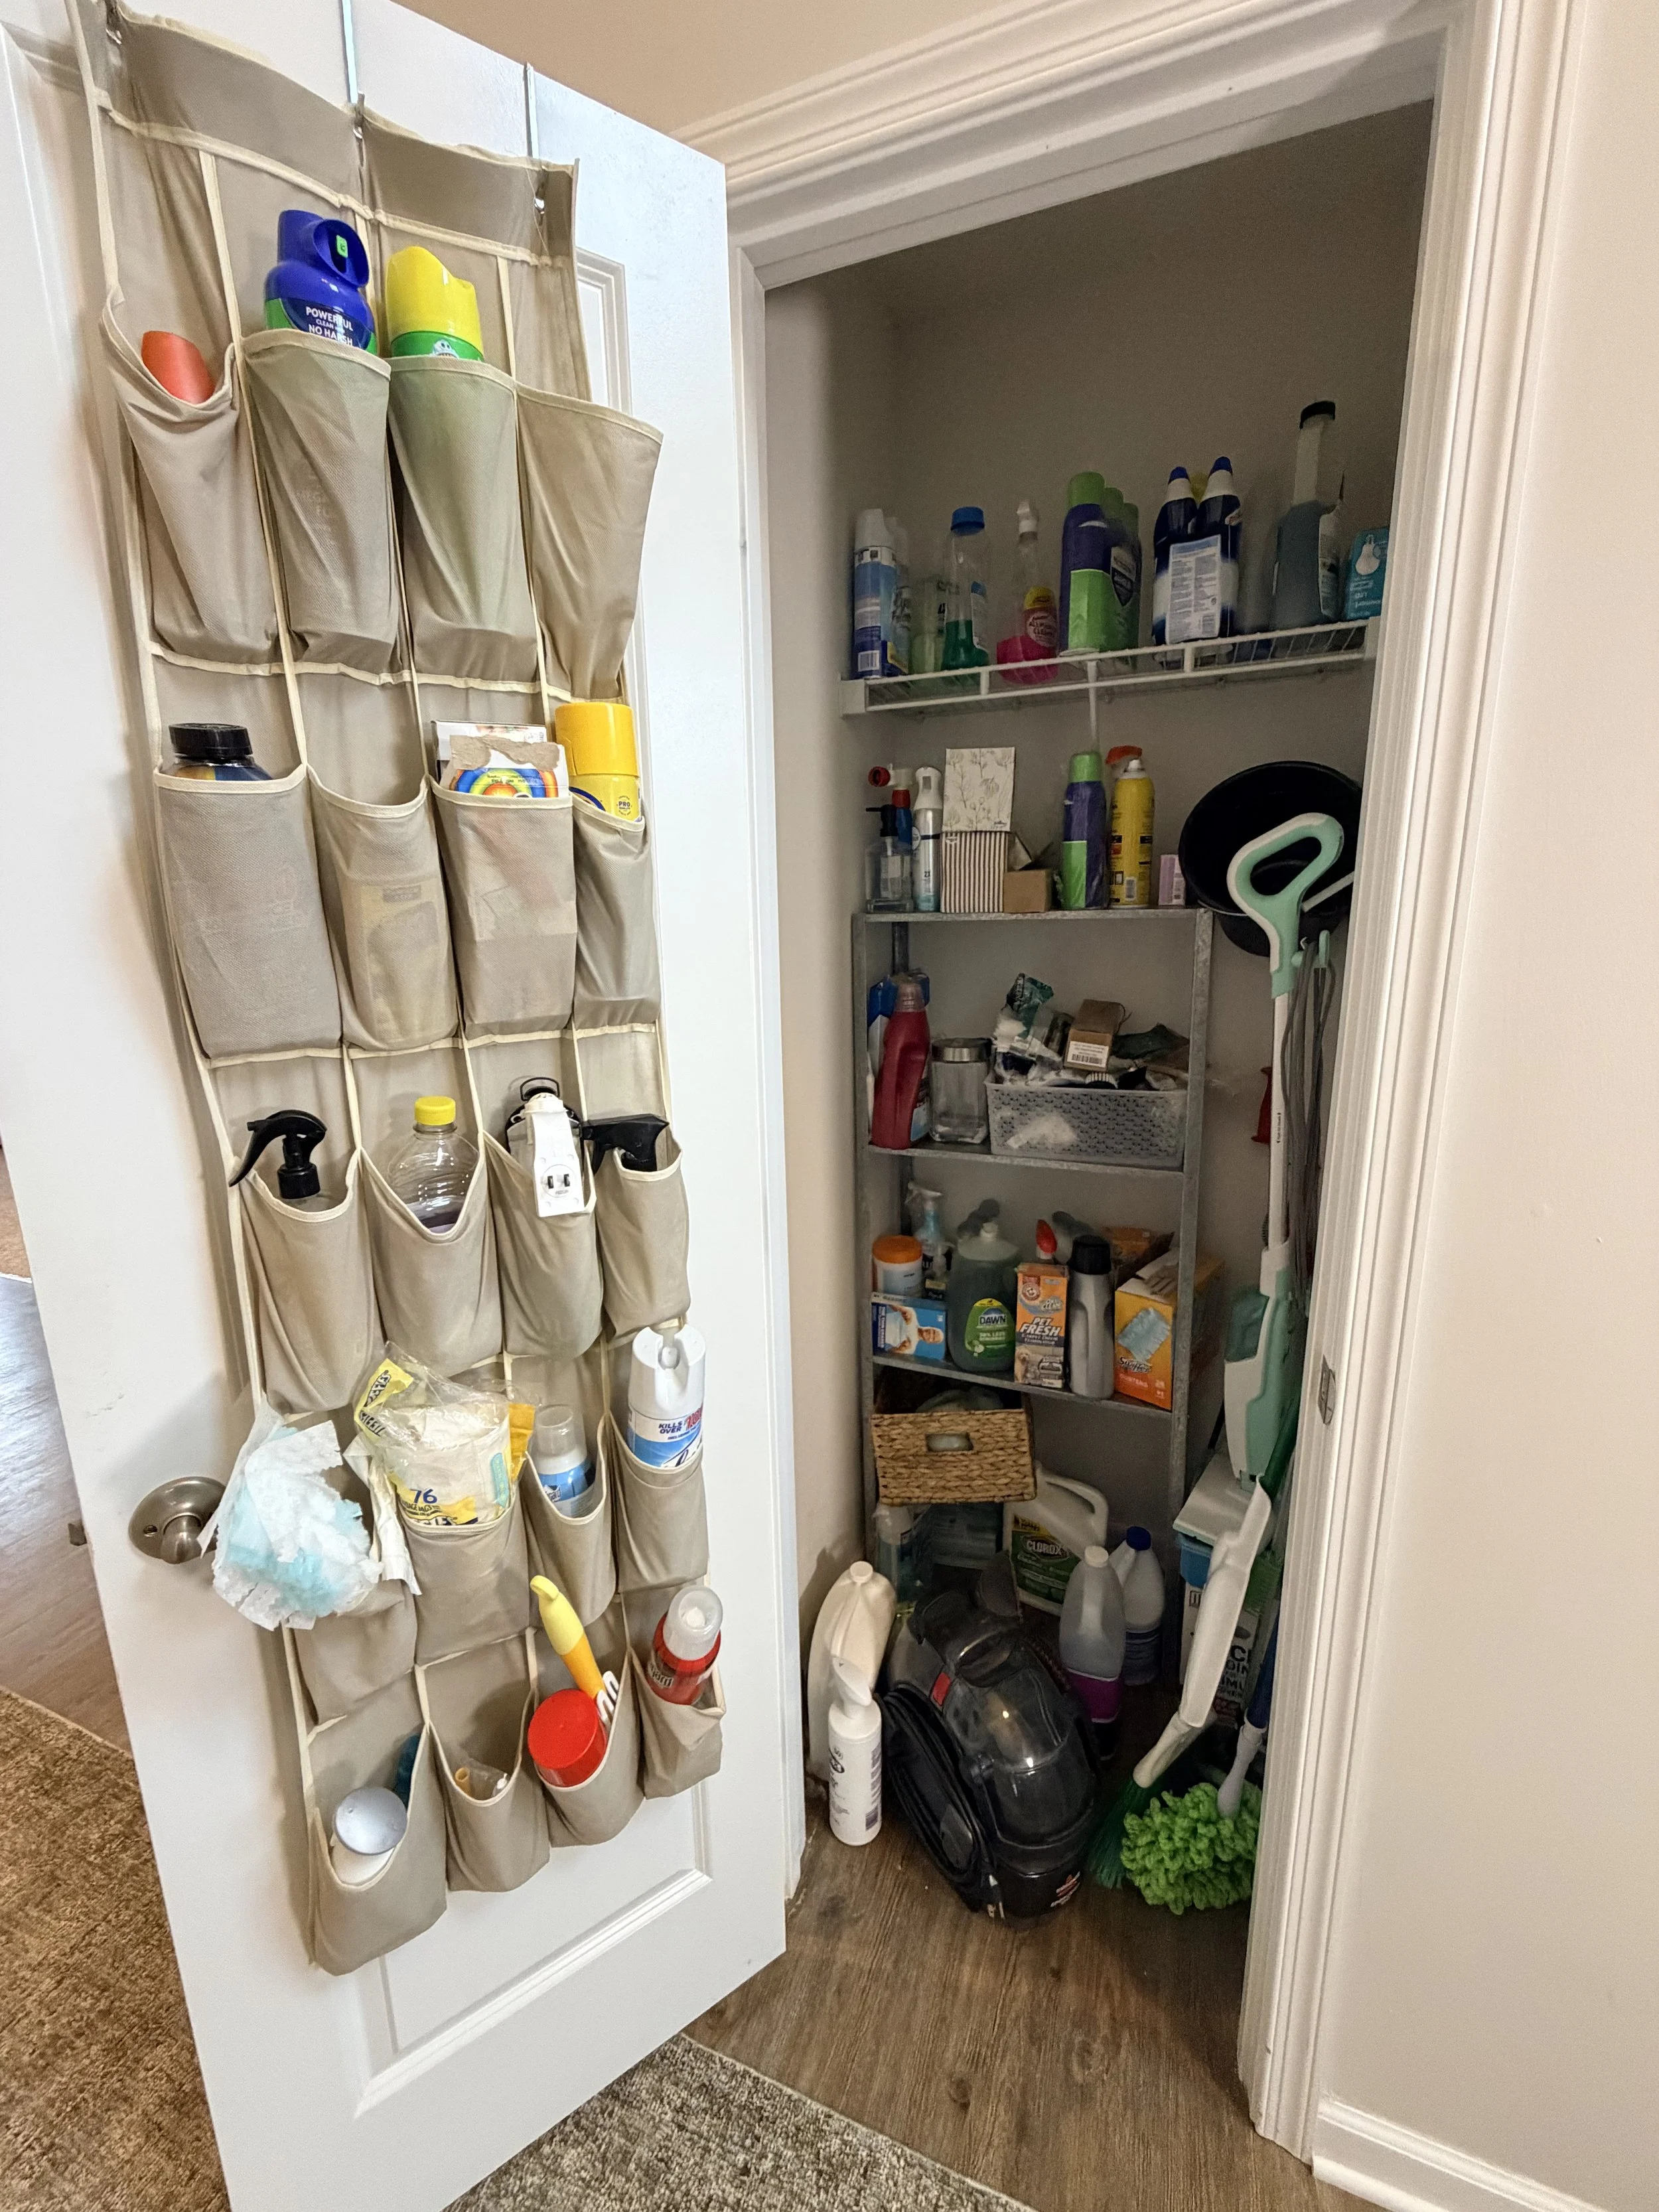
Our cleaning supplies desperately needed a designated home. Between the vacuum, broom, mop, carpet cleaner, and all the random cleaning products we use around the house, I needed a space that would keep everything organized without feeling cluttered.
The challenge? I was working with a small closet that measured approximately 32 inches wide by 31 inches deep, with no electrical outlets and not a whole lot of room to work with.
But I had a vision, and I was determined to make every inch count!
Planning the Cleaning Closet Makeover
Before I started building anything, I took inventory of everything I wanted to store in this space.
My biggest priority was making sure the larger cleaning tools had a designated spot. I didn't want to have to pull out five things just to get to the vacuum!
I also wanted shelves for smaller cleaning supplies and a way to utilize the inside of the closet door for additional storage.
Here were my main goals:
Create a dedicated space for the upright vacuum and other tall cleaning tools.
Build custom shelves for cleaning products and smaller appliances.
Maximize the vertical space without making the closet feel crowded.
Add lighting since there are no outlets inside the closet.
Make it PRETTY! Because who says a cleaning closet can't look good?
Step 1: Adding Wallpaper and Paint
I know what you're probably thinking. Wallpaper in a cleaning closet?!
YES! And I'm so glad I did.
I wanted this space to feel like a little extension of the rest of our home rather than just another storage closet.
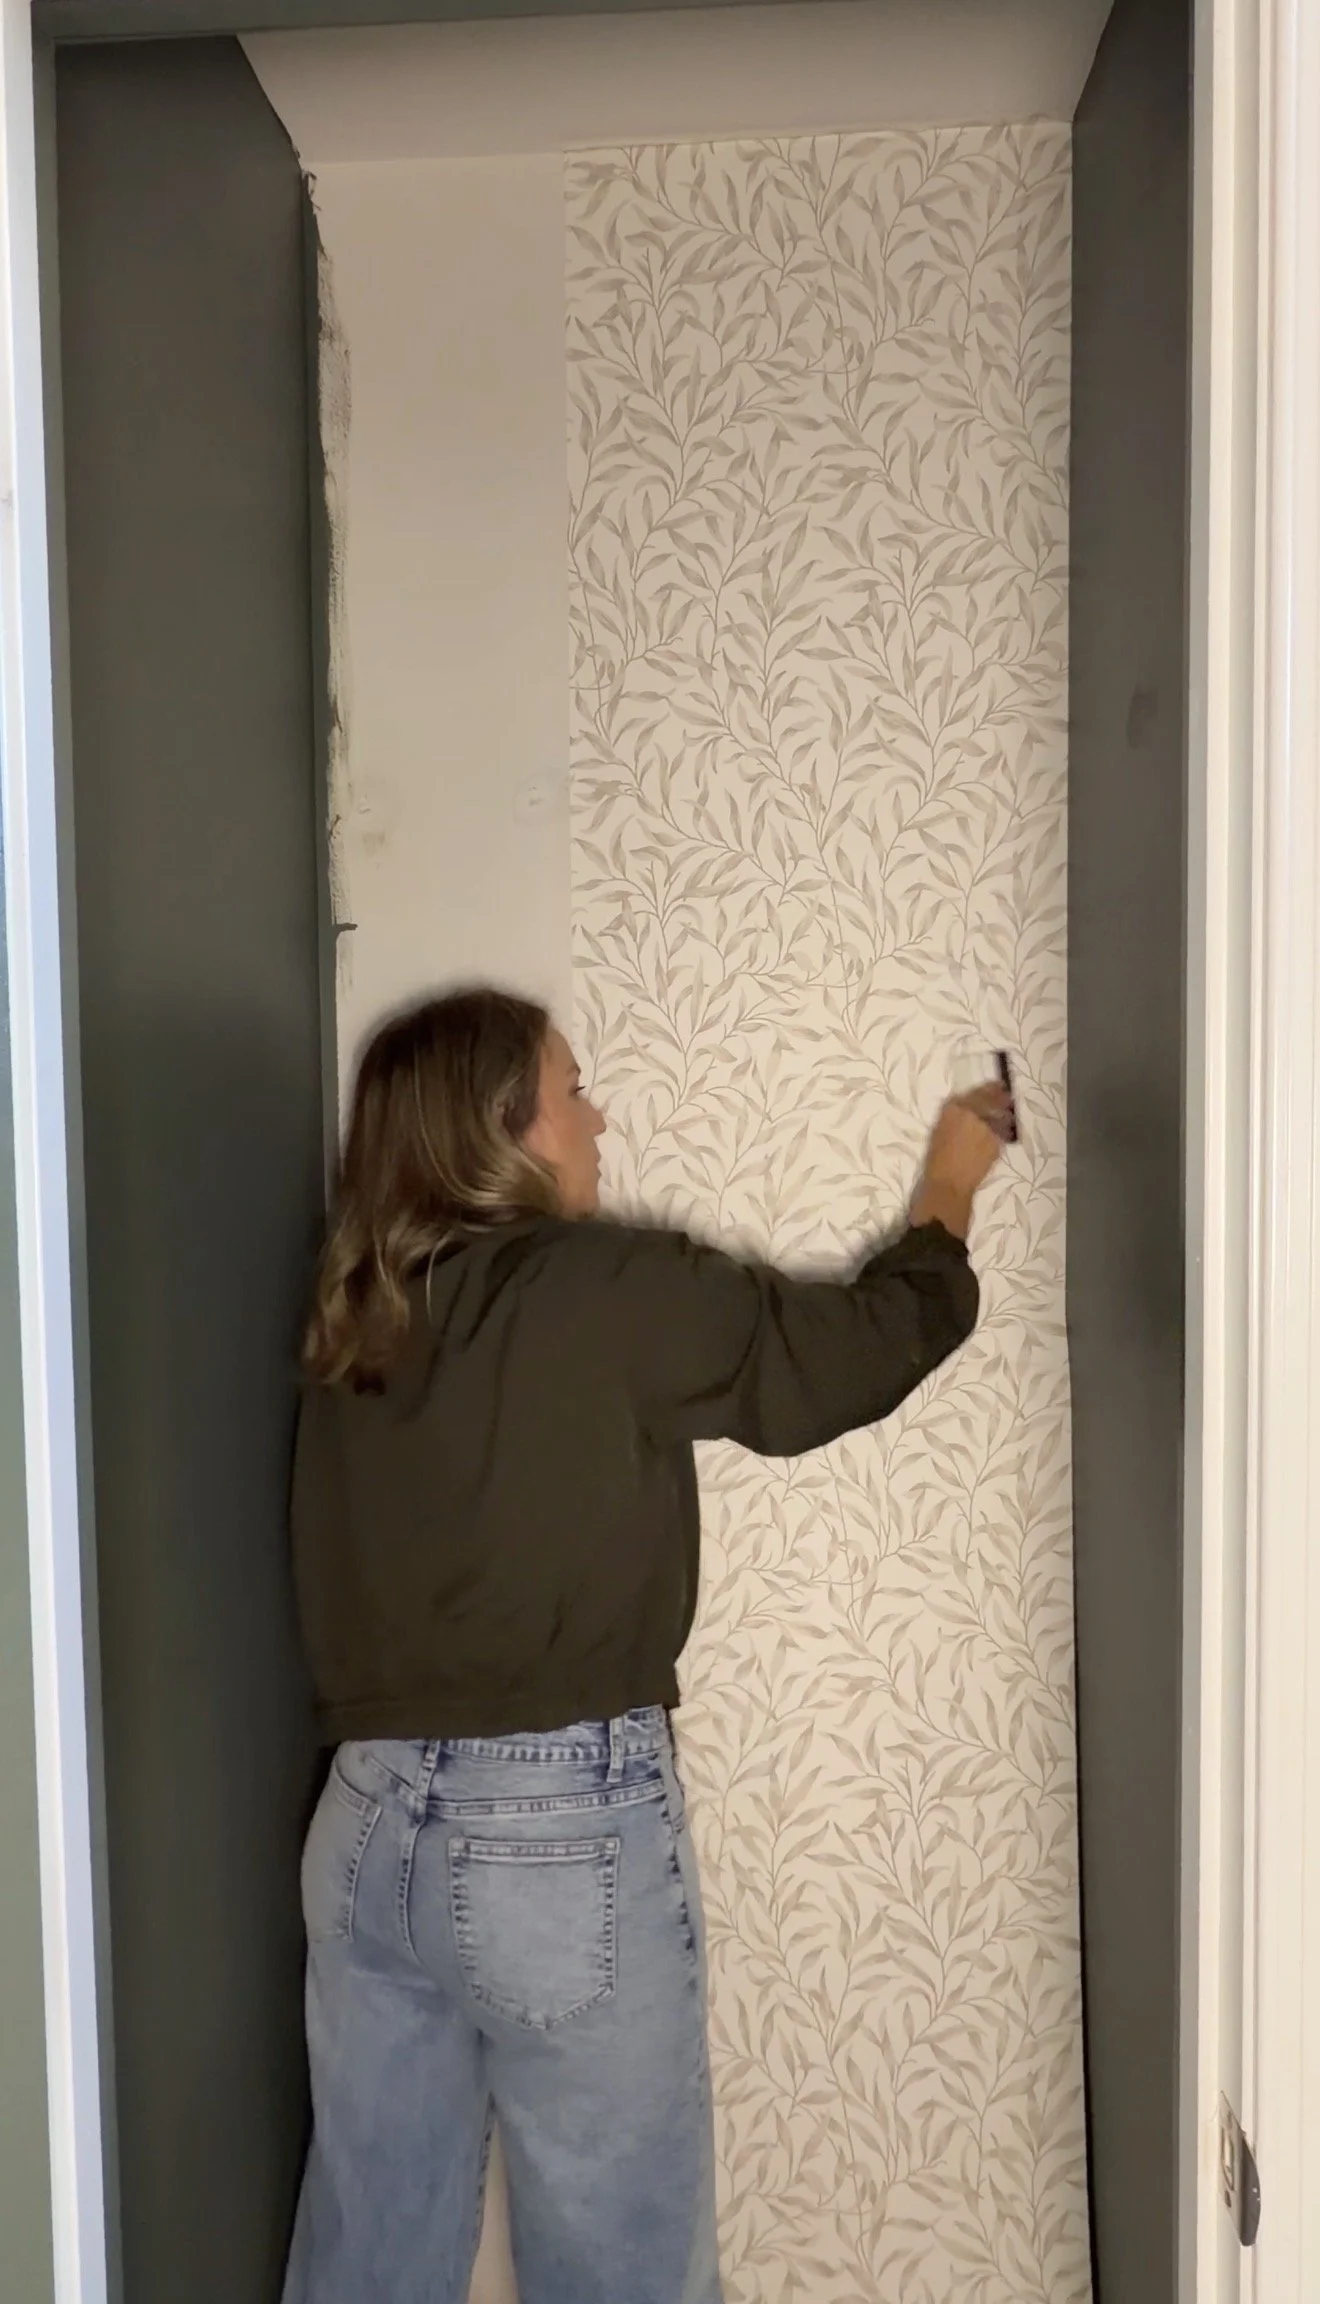
For the back wall, I used a beautiful white botanical wallpaper from NextWall. It adds just enough pattern and personality without overwhelming the small space.
Then I painted the built-ins and the inside of the closet door Sherwin-Williams Pewter Green.
If you've been following my projects for a while, you probably already know I love a good green paint color. This one is such a pretty, muted green and pairs beautifully with the natural wood shelves.
I kept the side walls white to help the space feel brighter.
Step 2: Building Custom Closet Shelves
This was probably the most important part of the entire makeover.
Instead of purchasing a premade closet organization system, I decided to build custom shelves so I could maximize the space for the exact items I needed to store.
The closet is only about 32 inches wide, so every inch mattered.
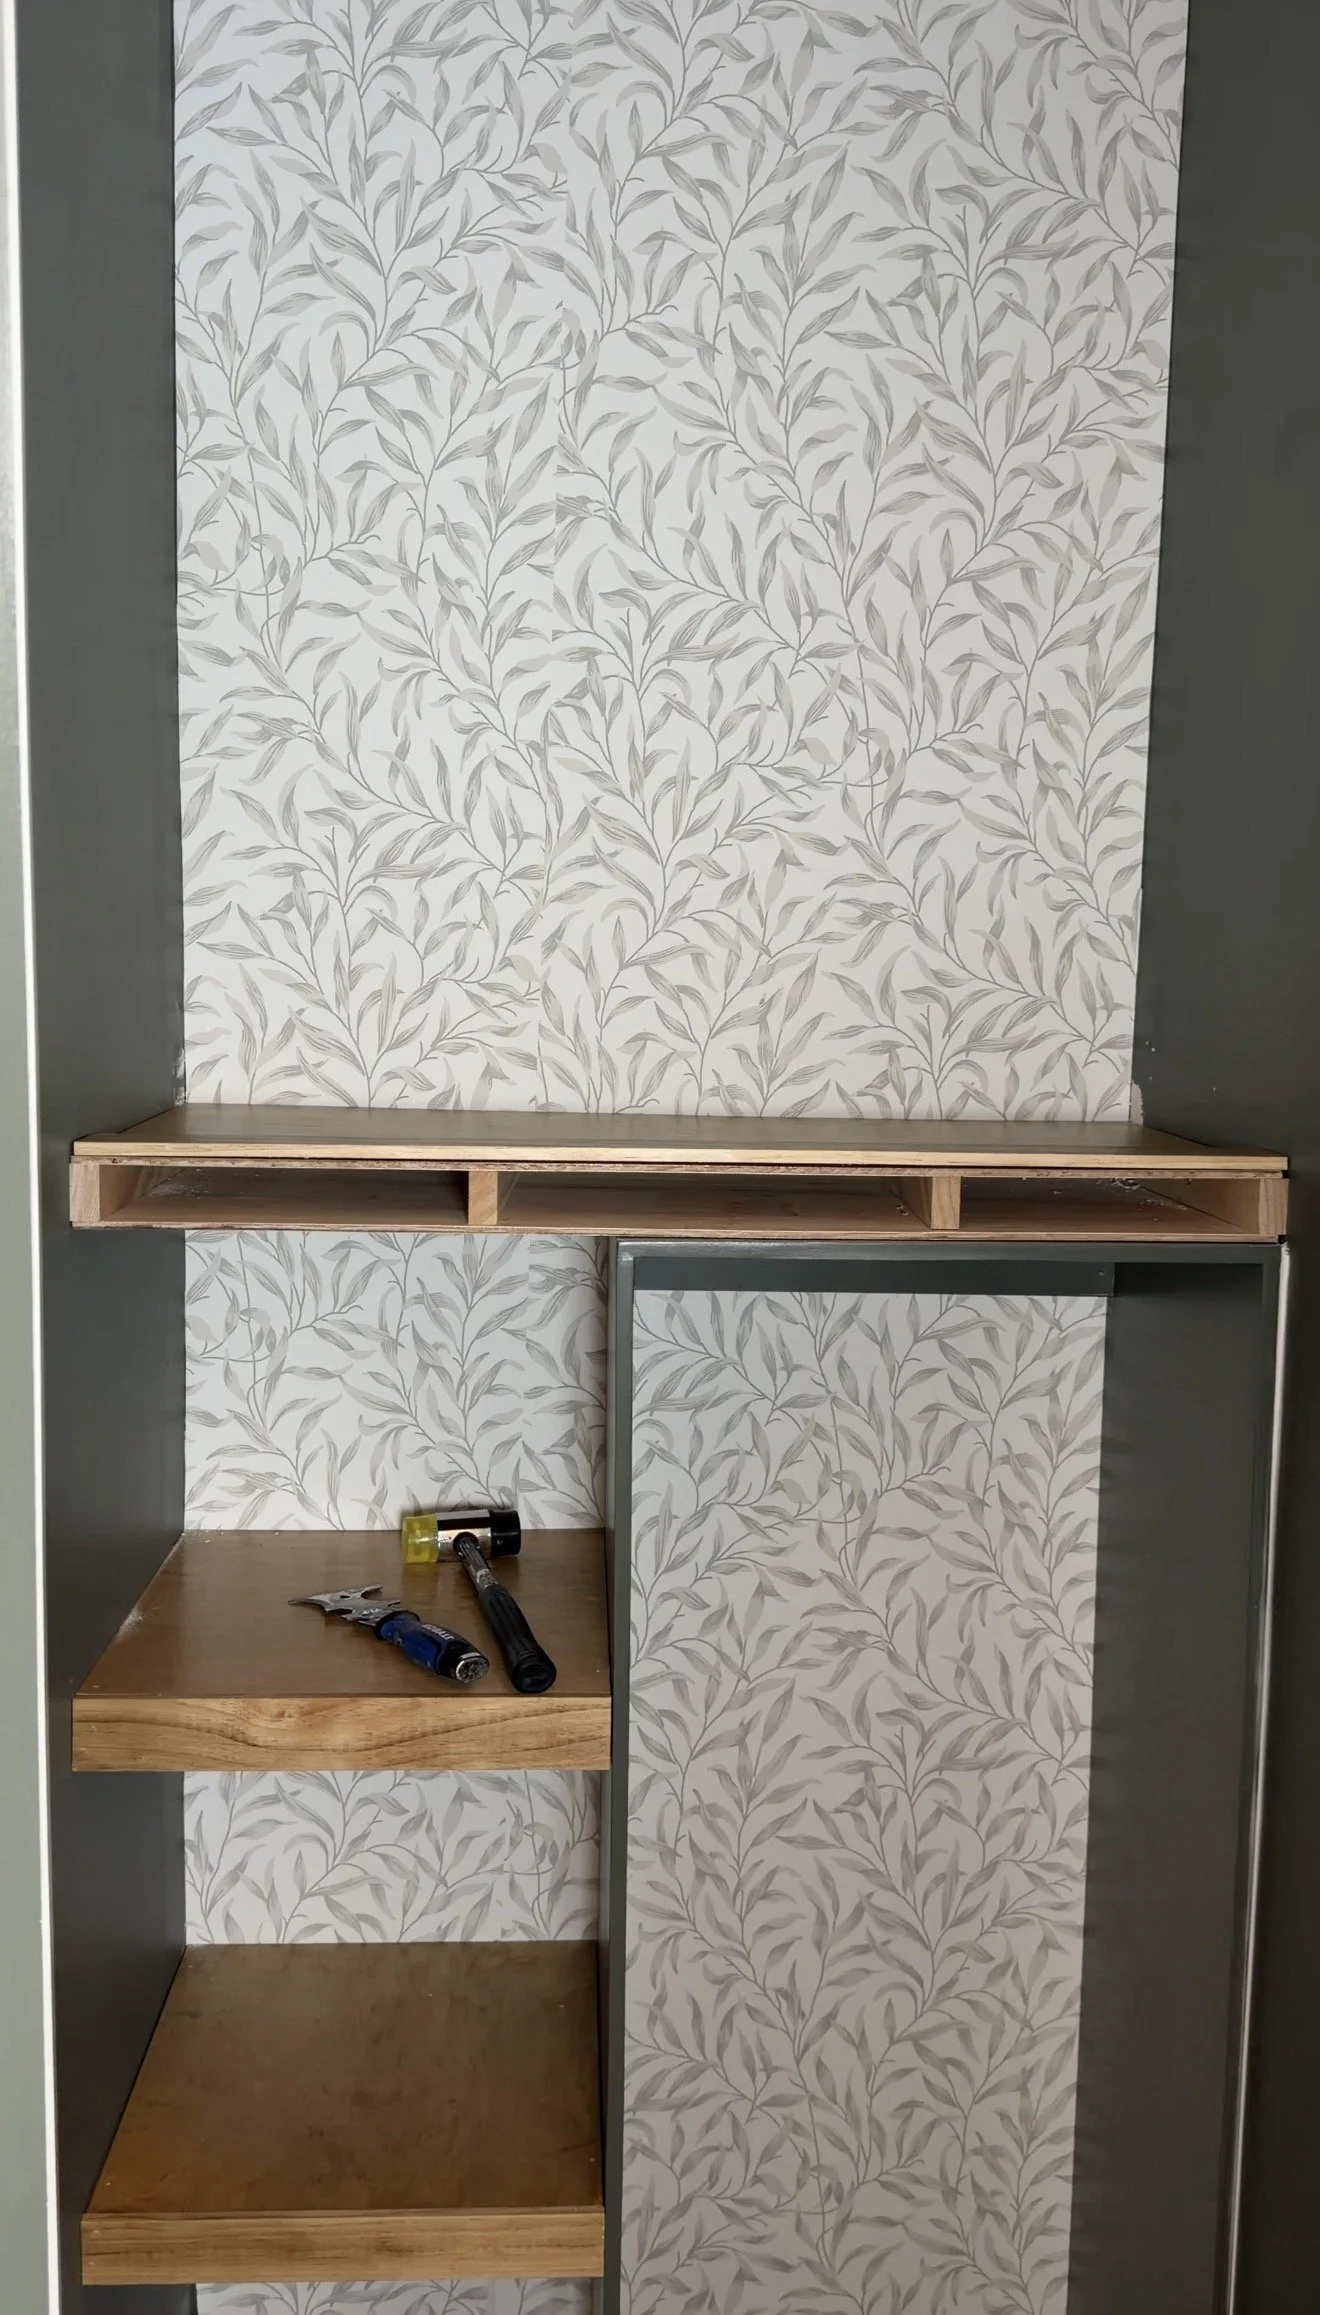
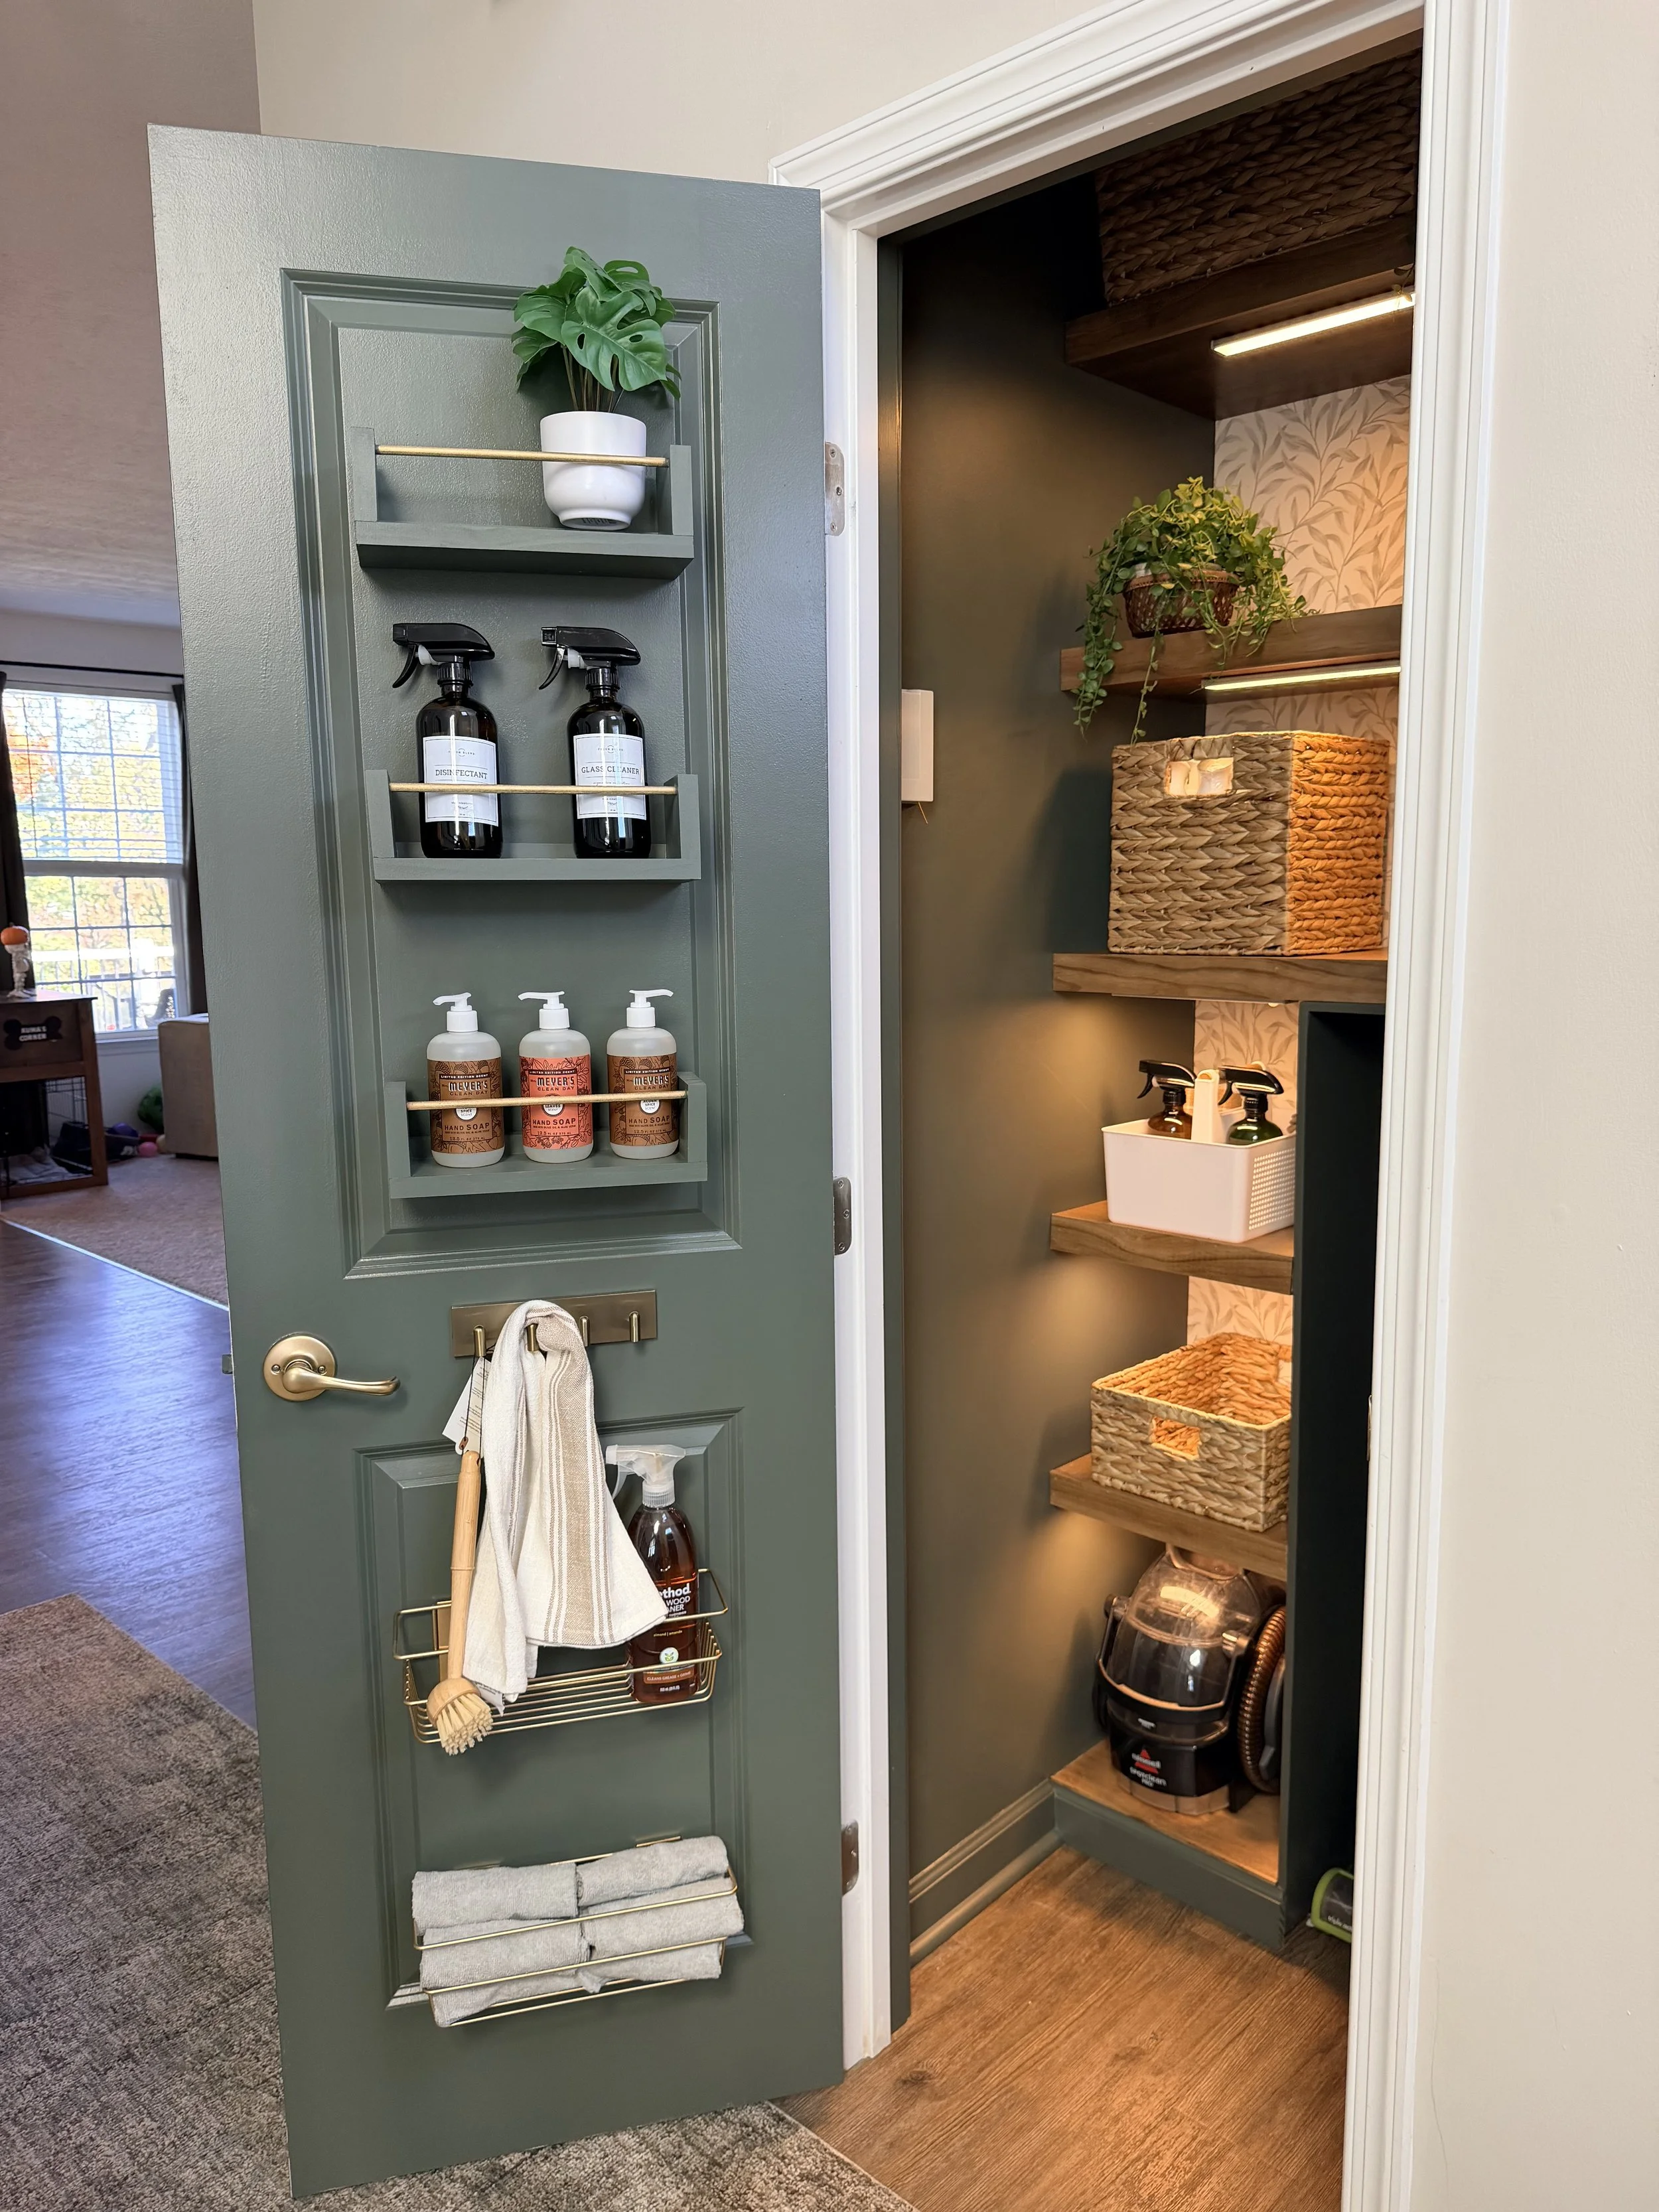
I designed the layout with a taller compartment on the right side for the vacuum and cleaning tools, while the left side provides additional shelving for smaller items.
For the vacuum cubby, I used 1/2” plywood. For a full video tutorial of how I did that, check out my YouTube video that’s linked below.
For the shelves, I wanted the look of thick, solid wood without the weight or cost.
I used a combination of:
By creating a frame using the pine boards and covering it with plywood, I was able to give the shelves the appearance of being approximately 2 inches thick.
This is one of my favorite tricks for creating high-end-looking built-ins on a budget!
I finished the wood using Minwax Special Walnut stain, followed by two coats of water-based polyurethane for added protection.
The contrast between the warm wood and the green paint is exactly what I was hoping for.
Step 3: Creating Dedicated Storage for Cleaning Tools
One thing I really wanted to avoid was having all of our cleaning tools leaning against each other in the corner.
I needed everything to have its own spot!
The taller section of the built-in was designed to accommodate our upright vacuum, while leaving room for other cleaning tools.
I also incorporated shelves for things like our handheld carpet cleaner and cleaning products.
One of the biggest lessons from this project was to measure your actual cleaning tools before finalizing your shelf placement.
Some of my appliances were a little larger than I initially anticipated, so I had to make a few adjustments along the way.
That's DIY for you!
But that's also one of the biggest benefits of building your own storage system. You can customize everything to fit your space and your needs.
Step 4: Adding Storage to the Inside of the Door
If you're working with a small closet, don't forget about the door!
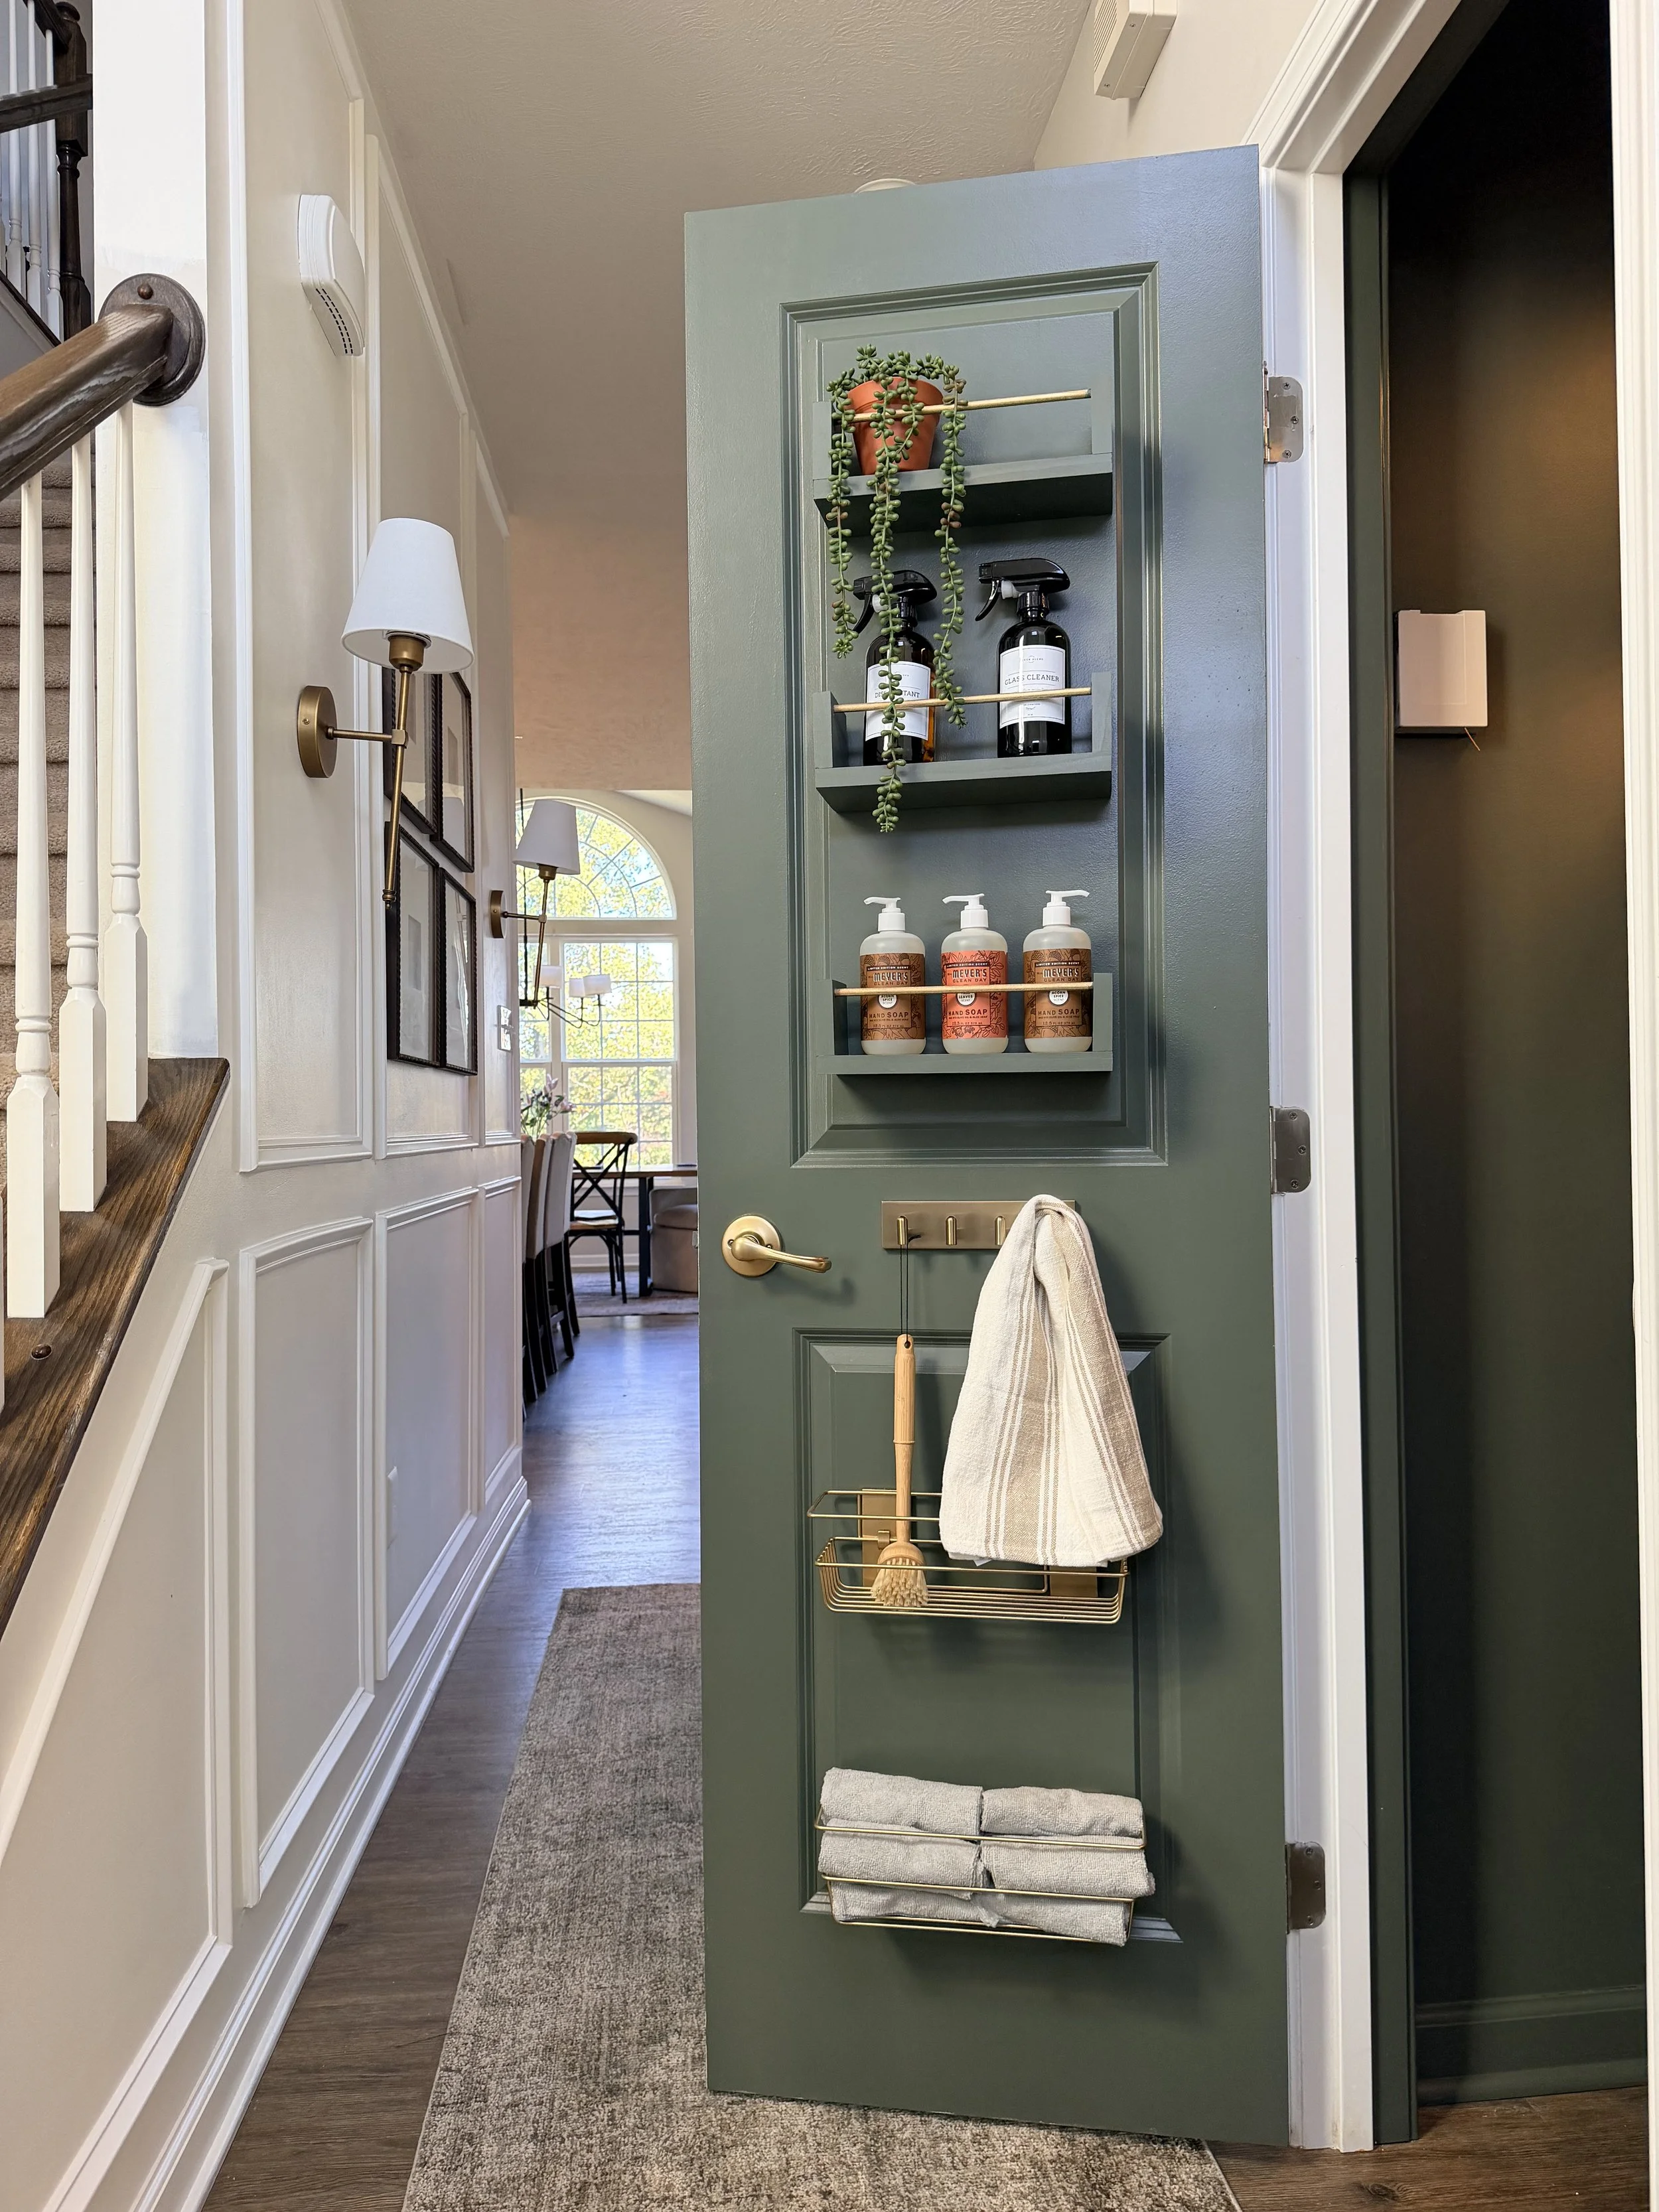
I wanted to take advantage of every possible inch, so I added three small wooden shelves to the inside of the closet door.
I also incorporated gold storage baskets for smaller cleaning supplies.
Fun fact: Some of the baskets were actually shower caddies that I painted gold!
I love finding creative ways to repurpose inexpensive items, especially when they work perfectly for what I need.
This little addition gave me significantly more storage without taking up any valuable floor space.
Step 5: Installing Lighting Without Electrical Outlets
This might be my favorite little detail from the entire project.
The closet has no electrical outlets, and I didn't want to deal with running new wiring just to add lighting.
Instead, I installed rechargeable motion-sensor LED light bars.
And let me tell you, they made SUCH a difference!
Not only do they brighten the space, but they also make the entire closet feel more finished and custom.
Since they're motion-activated, the lights turn on automatically when movement is detected.
It's such a simple upgrade, but it makes a huge difference in how functional the closet feels.
If you have a pantry, linen closet, or small storage space without electrical outlets, this is definitely an upgrade worth considering.
The Finished DIY Cleaning Closet
I genuinely can't believe how much more functional this little closet is now.
Everything finally has a designated home, and I no longer have to dig through a pile of cleaning supplies just to find what I need.
But what I love most is that I didn't need a large space or an expensive organization system to make it happen.
With a little planning, some basic building materials, and a few creative storage solutions, I was able to completely transform this tiny closet.
And yes, I absolutely painted a cleaning closet green and added wallpaper.
No regrets!
[Insert AFTER photo of the completed cleaning closet]
Tips for Organizing a Small Cleaning Closet
If you're thinking about tackling a similar project, here are a few things I'd recommend:
Measure everything first. Don't just measure the closet. Measure your vacuum, mop, broom, and any appliances you want to store.
Use vertical space. Adding shelves above taller appliances is a great way to maximize storage.
Don't overlook the door. Even a few inches of extra storage can make a big difference.
Consider rechargeable lighting. You don't necessarily need an electrician to brighten a dark closet.
Make it your own. Just because it's a utility space doesn't mean it has to be boring!
Shop the Cleaning Closet Makeover
Here are some of the products and materials I used for this project:
NextWall white botanical wallpaper
Sherwin-Williams Pewter Green paint
1/4-inch maple plywood
1x2 pine boards
Minwax Special Walnut wood stain
Water-based polyurethane
Rechargeable motion-sensor LED light bars
Gold storage baskets
Closet organization accessories
SHOP EVERYTHING HERE
Final Thoughts
I think one of the things I love most about DIY is that you don't always need to tackle a massive renovation to make your home work better for you.
Sometimes it's the smallest spaces that make the biggest difference in your everyday routine.
And this cleaning closet is the perfect example!
If you're looking for more approachable DIY projects, home organization ideas, and budget-friendly makeovers, I'd love for you to follow along with Builds by Ashley.
Happy building!