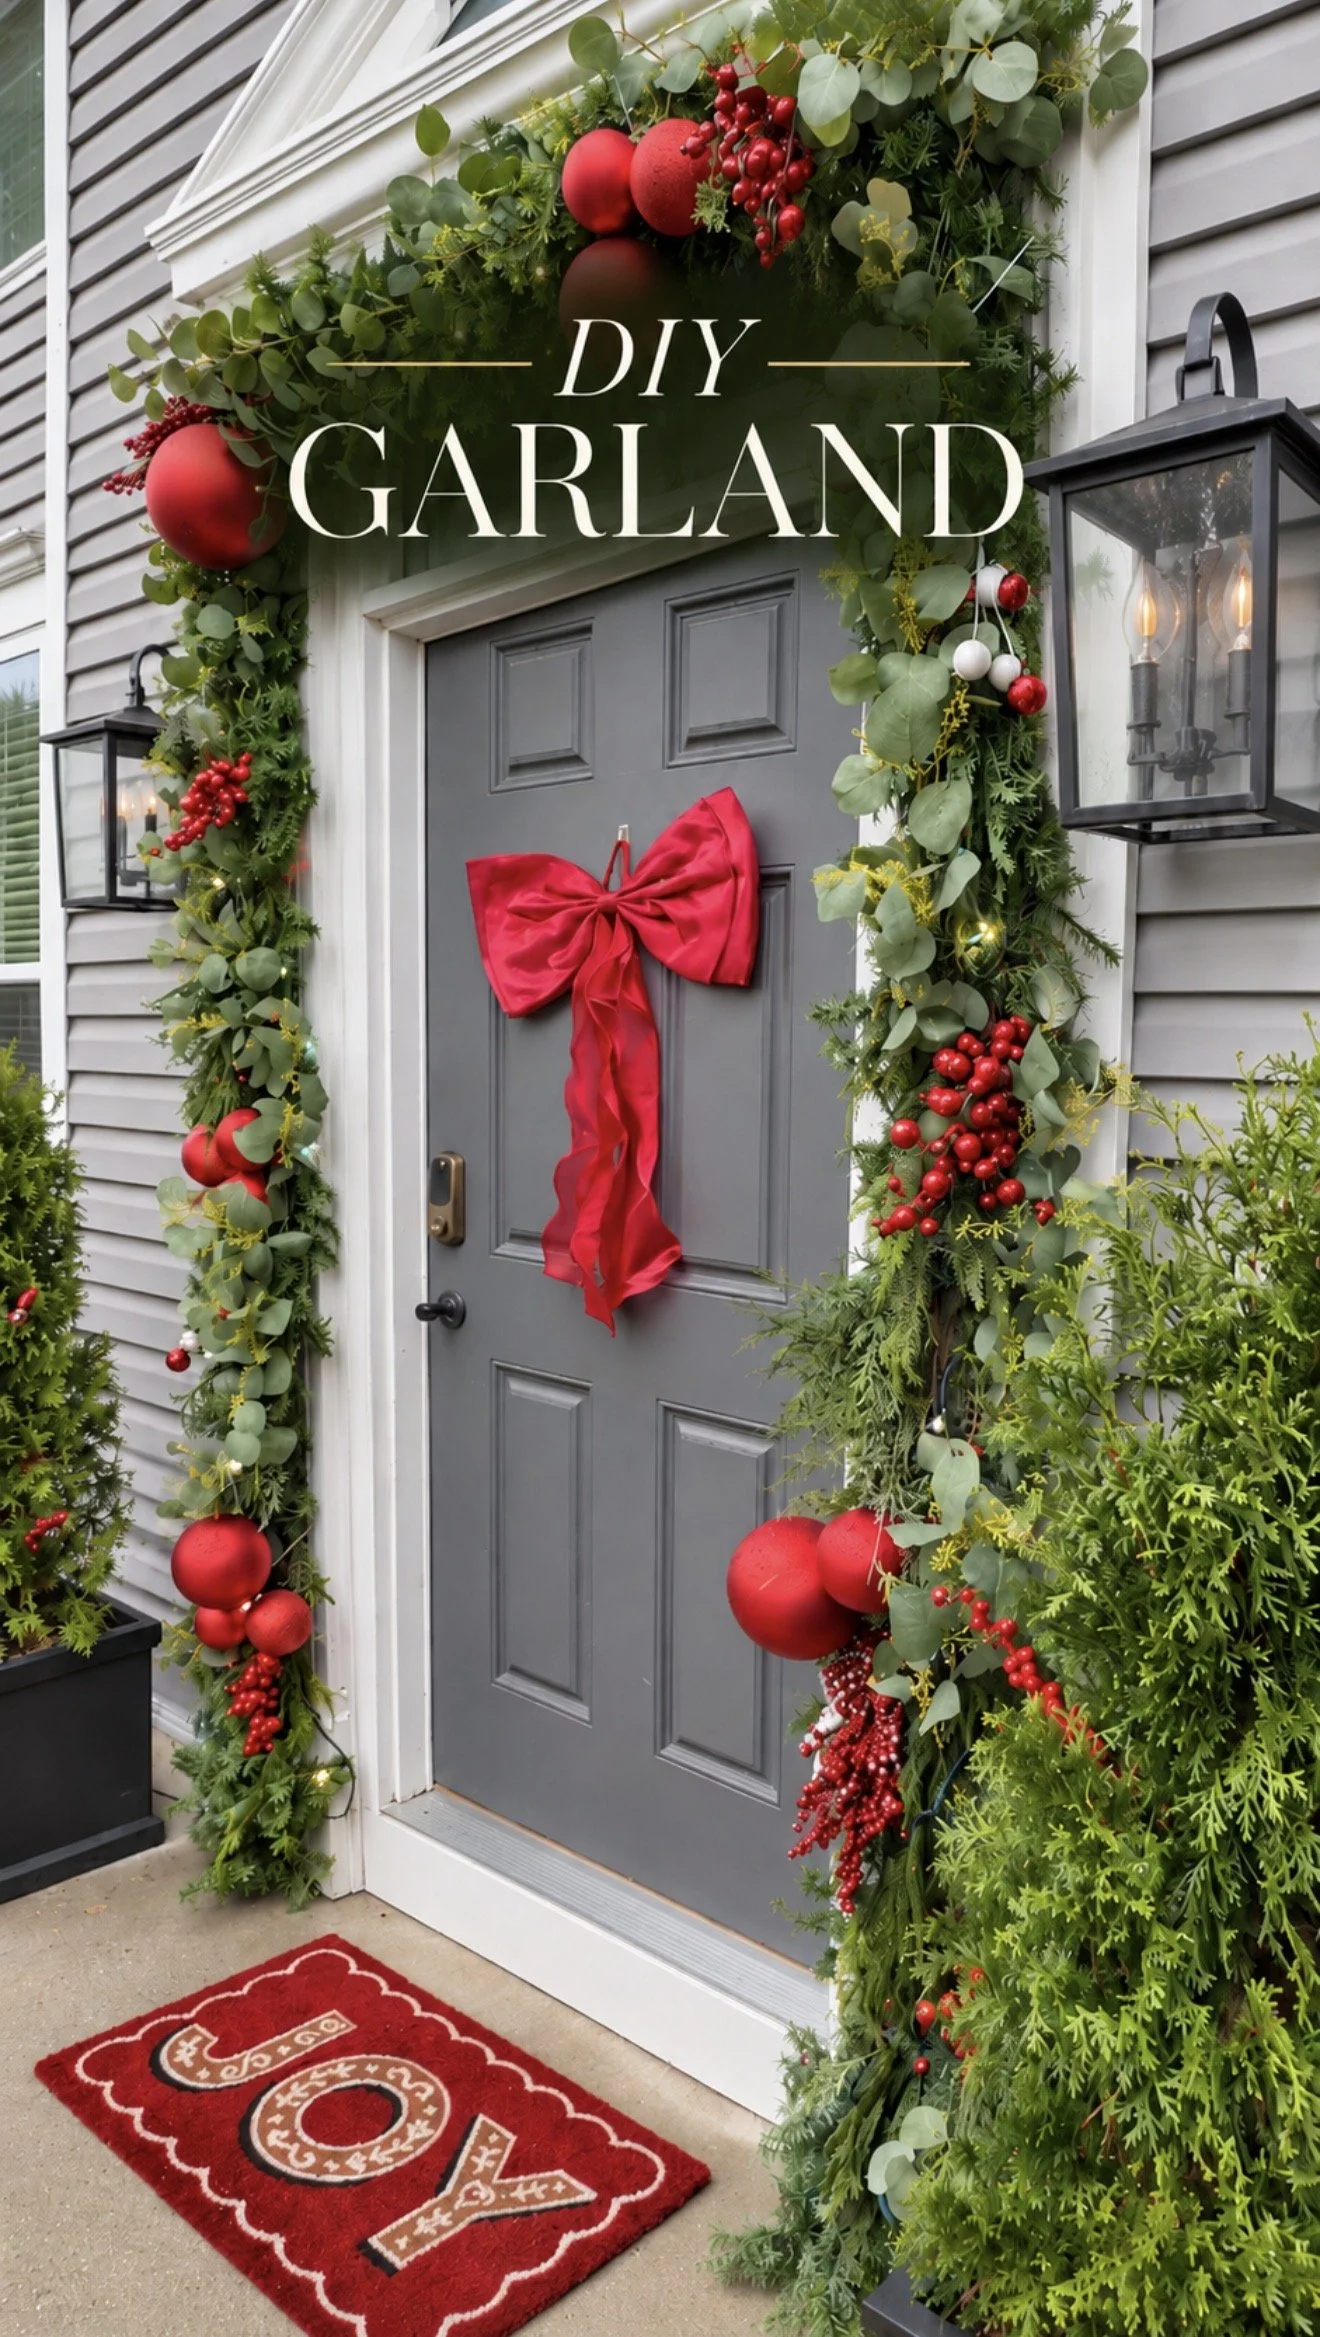
I love the look of those big, full Christmas garlands you see in Pottery Barn holiday displays. What I don't love is the price tag that comes with them!
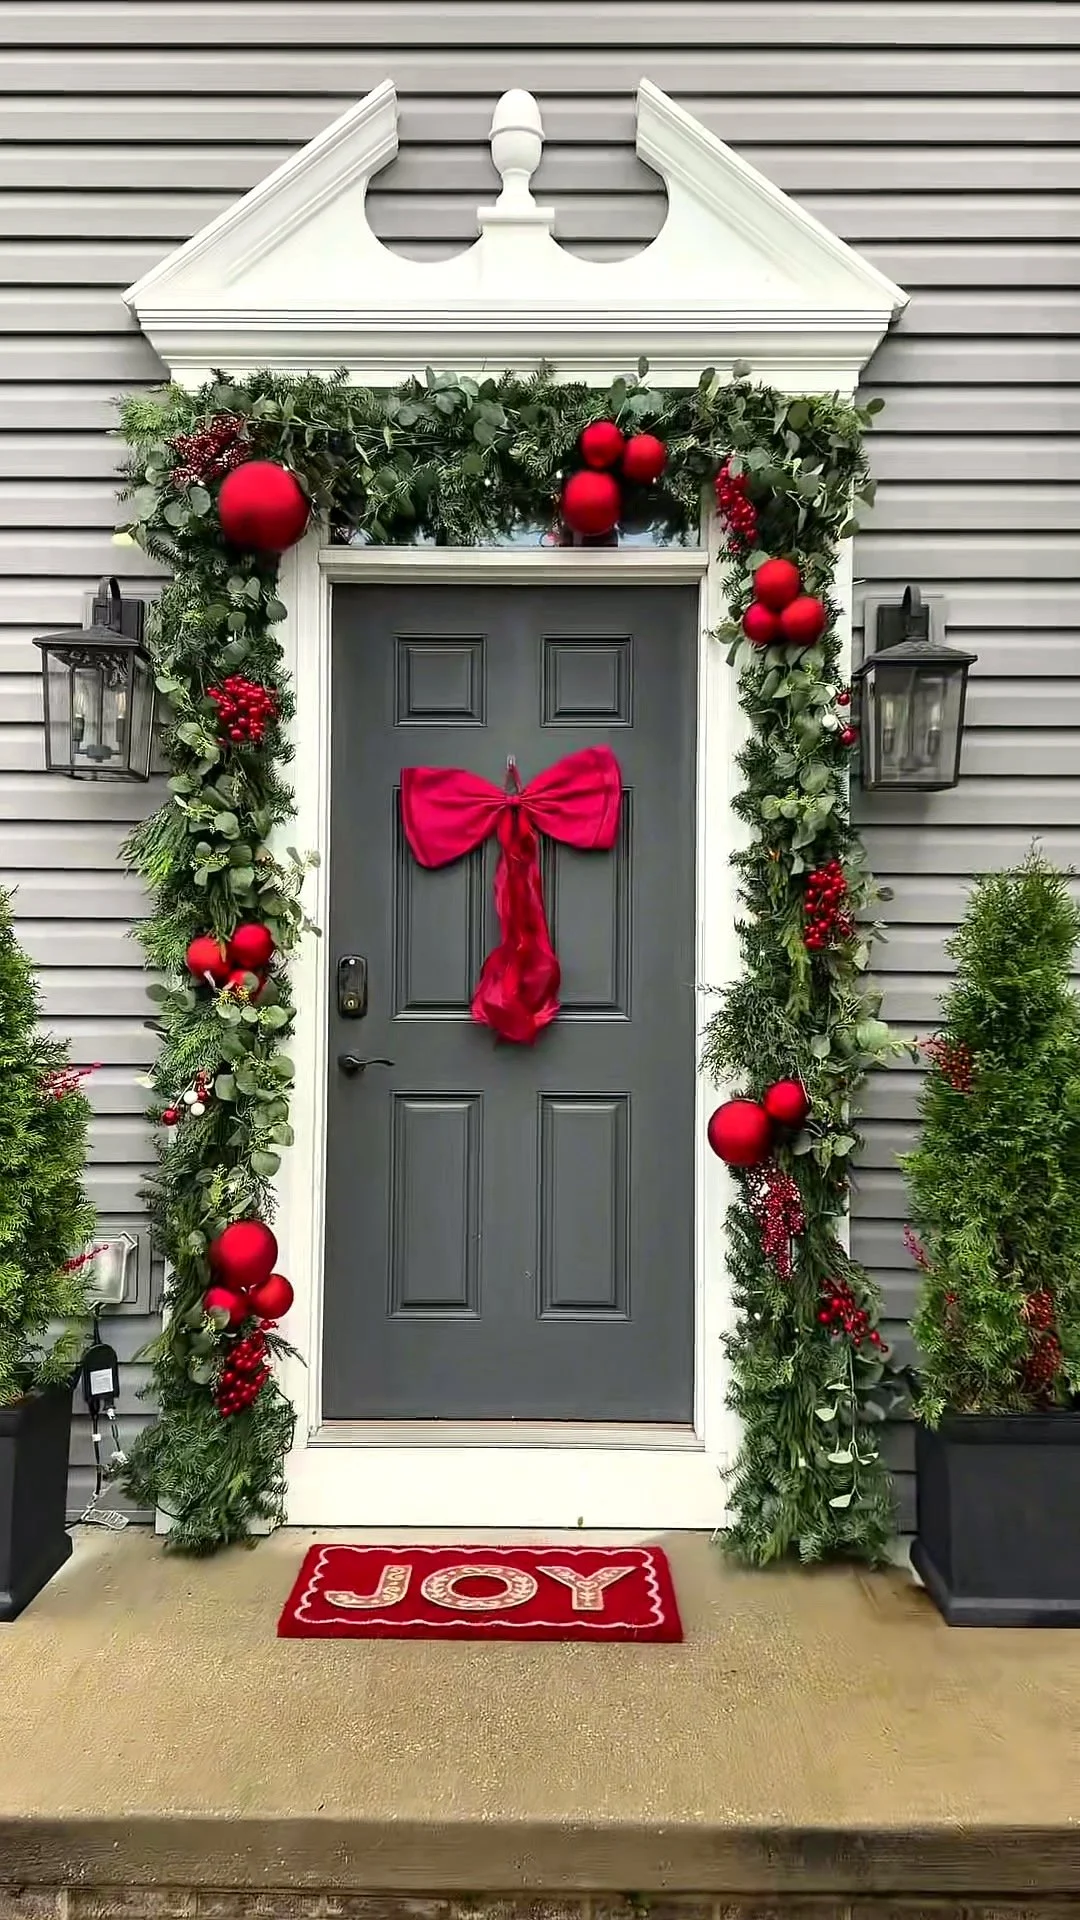
This year, I wanted to create an oversized Christmas garland for our front porch that looked high-end without spending hundreds of dollars on a single piece of greenery.
The secret? Chicken wire, cable ties, inexpensive garland, and lots of greenery stems.
With a little layering (and a lot of fluffing), I was able to turn basic $3.98 garland into a full, custom Christmas display that looks so much more expensive than it actually is.
Here's how I did it!
Supplies You'll Need
One of my favorite things about this project is that you don't need any expensive tools or specialty materials.
Inexpensive artificial Christmas garland (mine was $3.98 for 9 feet!)
Assorted faux greenery picks and branches
Outdoor-rated Christmas lights
Wire cutters (Mine came with the chicken wire I bought)
Hooks or other appropriate outdoor mounting hardware
Shop my supplies: https://shopmy.us/shop/collections/9060348
You can customize the greenery and decorations to match your Christmas style. I wanted something traditional and festive with lots of dimension, rich greenery, and pops of red.
Step 1: Create a Base With Chicken Wire
The biggest trick to creating a full, oversized garland is starting with a structure that gives you something to build upon.
Instead of layering expensive garland strands on top of each other, I used chicken wire as the foundation.
The chicken wire creates a lightweight, dimensional base that makes the entire garland appear much fuller without requiring nearly as much greenery.
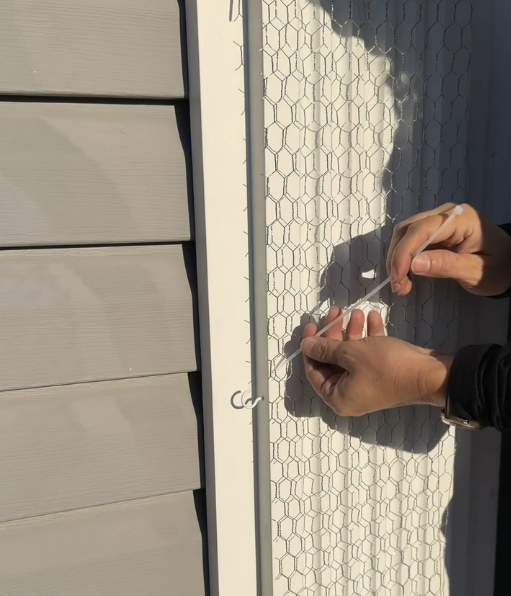
I cut mine to the size I wanted with the wire cutters that came with the chicken wire I bought and then attached it to the wall using cup hooks that I screwed into my trim.
This will look different for everyone depending on what type of material the outside of your house is. Command hooks also work great but it’s so windy where I live that I wanted to make sure everything was ‘permanent’. I used cable times to attach the wire to the hooks. I placed the hooks every 16-18”.
Tip: Wear gloves when working with chicken wire! The cut ends can be surprisingly sharp. Trust me - I got cut a few times!
Step 2: Attach Your Inexpensive Garland
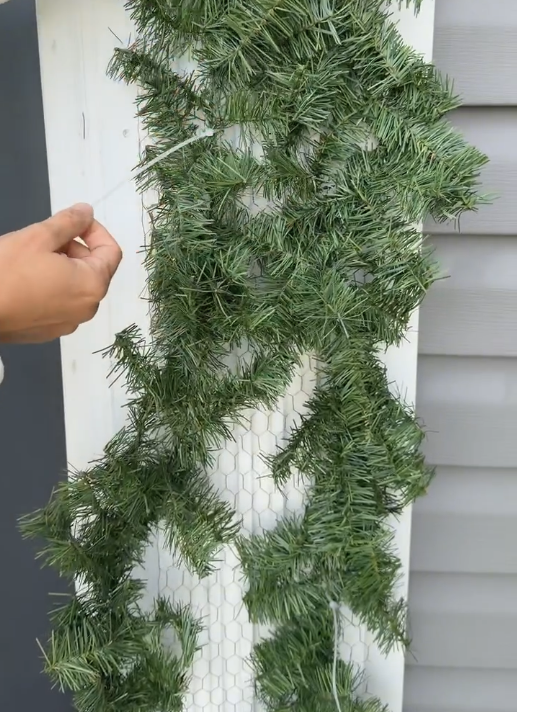
Next, I took my basic artificial Christmas garland and secured it to the chicken wire using cable ties.
This is where the project really starts coming together.
The garland doesn't need to be particularly thick or expensive because the chicken wire is doing a lot of the work to create volume.
Work your way along the chicken wire, securing the garland as you go. Then fluff and spread out the branches to cover the wire and create a natural-looking base.
Don't worry if it still looks a little sparse at this point. We're going to fix that!
Step 3: Layer in Different Types of Greenery
This is probably the most important step if you want your garland to look high-end.
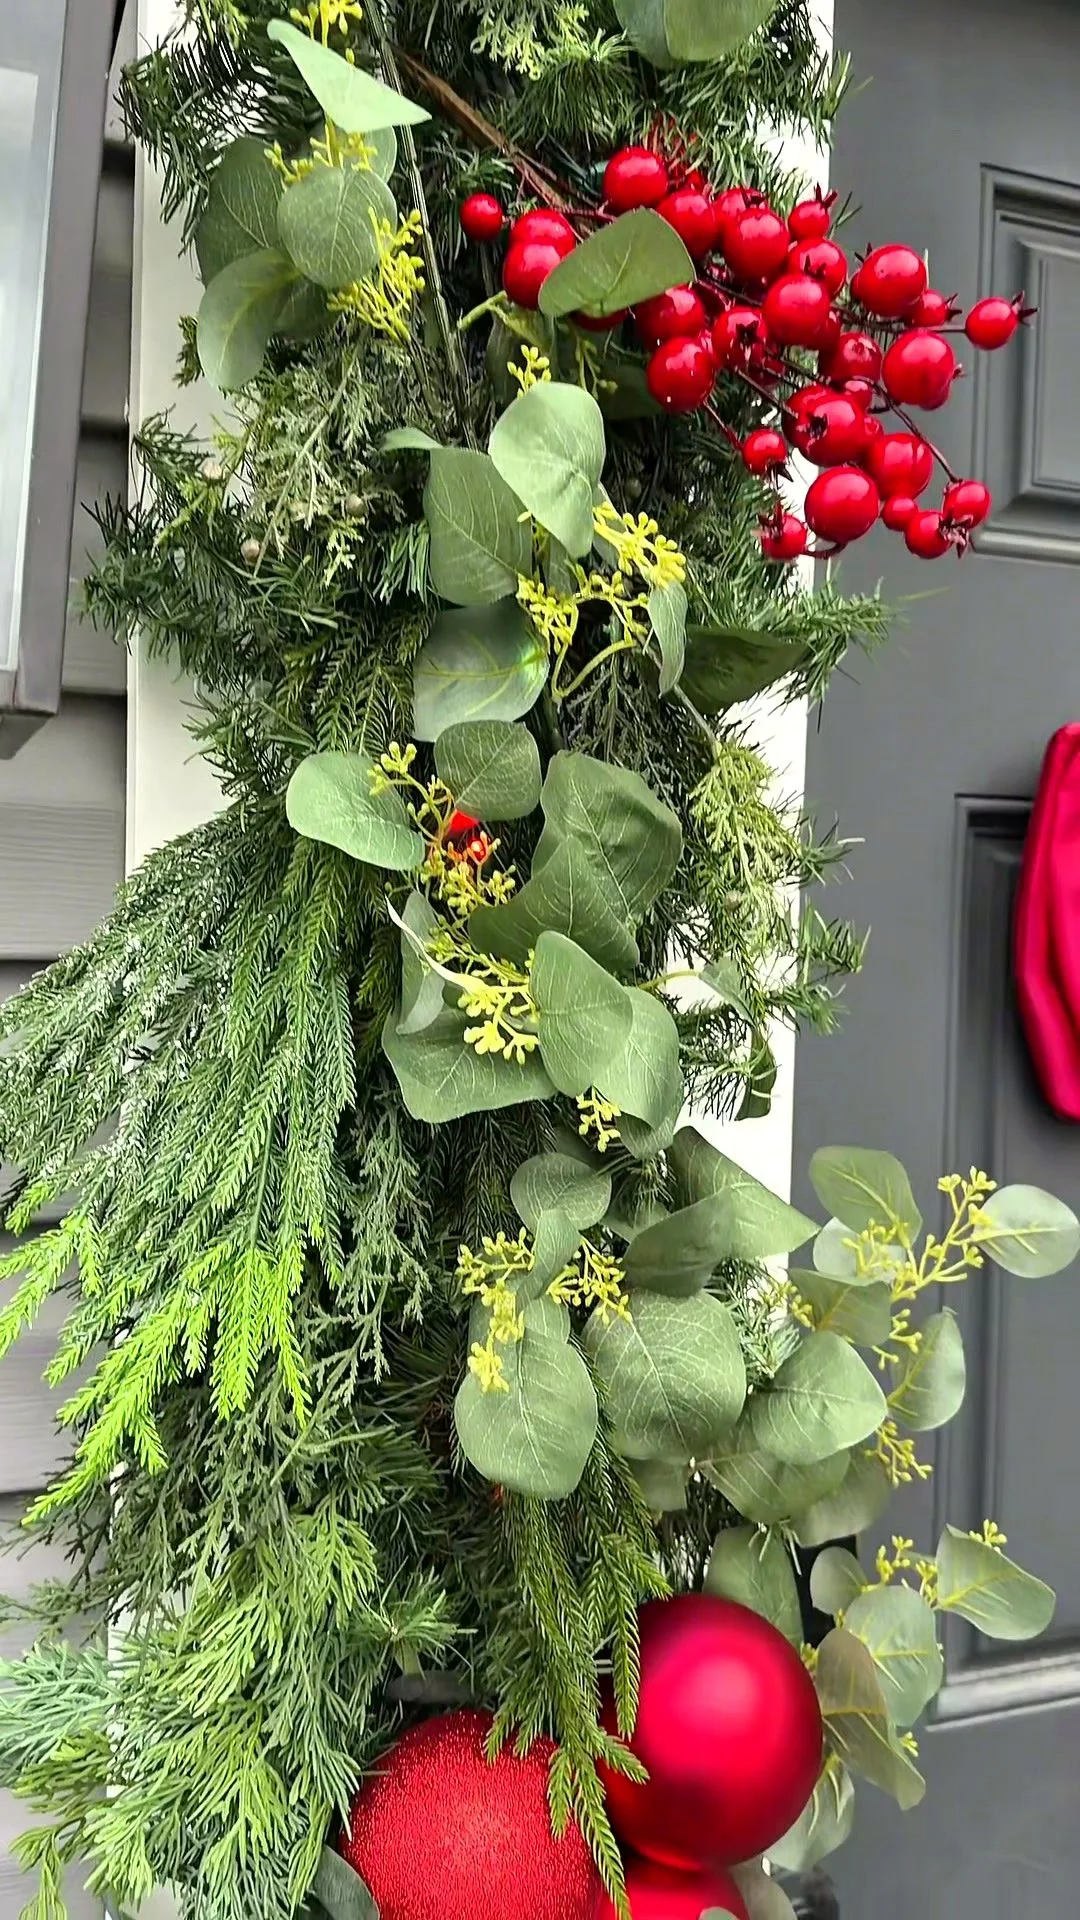
The secret to expensive-looking Christmas greenery is variety.
Instead of using just one type of greenery, I incorporated assorted faux evergreen stems to create texture, depth, and a more realistic appearance.
Mixing different branch shapes, lengths, and shades of green makes the garland look much more natural.
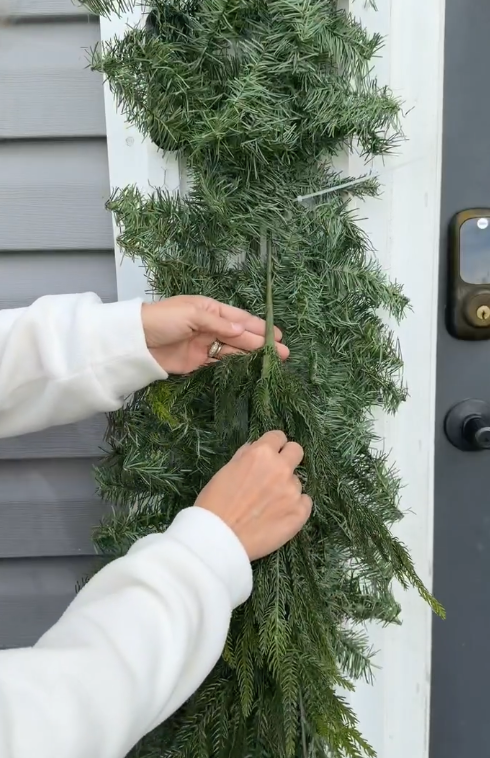
Tuck the stems into the existing greenery, slipping it into the chicken wire to hold it in place, alternating their placement so the finished garland doesn't look too uniform.
You want it to look full and intentional, but not perfectly symmetrical.
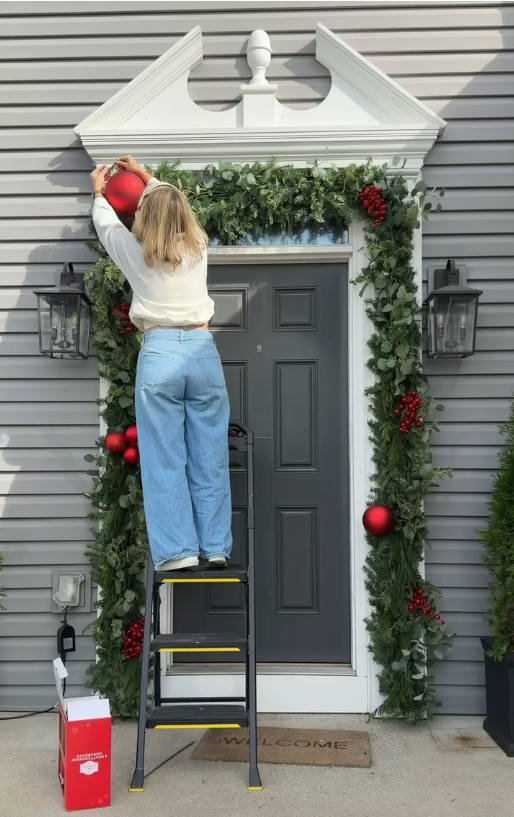
Step 4: Add Red Berries and Ornaments
Once I was happy with the fullness of the garland, I started adding some Christmas color.
I wanted our front porch to have a traditional, almost Santa's-workshop-inspired feel, so I incorporated red berry stems and Christmas ornaments.
Rather than spacing everything perfectly evenly, I grouped some of the accents together to create a more natural, layered look.
The red berries add just enough contrast against the greenery, while the ornaments give the garland a little extra holiday magic.
You could easily customize this step with ribbon, pinecones, bells, or whatever fits your holiday decor.
Step 5: Add Christmas Lights
Of course, I couldn't make a giant Christmas garland without adding lights!
I worked Christmas lights throughout the greenery to make the entire display stand out at night. I attached it every so often with, you guessed it, more cable ties!
For an outdoor project like this, make sure your lights are rated for exterior use and that all electrical connections are protected from moisture.
I also recommend checking the lights before you finish arranging all your greenery. It's much easier to make adjustments before everything is in place.
Step 6: Fluff, Adjust, and Finish!
This is the part that makes the biggest difference.
Once everything is attached, take a few minutes to step back and look at the garland from different angles.
Are there any sparse spots? Does one side look heavier than the other? Could a few branches be pulled forward to add more dimension?
I spent some time adjusting individual stems, moving berries around, and making sure the greenery had that oversized, layered appearance I was going for.
It's amazing how much of a difference those little finishing touches make!
How Much Does a DIY Christmas Garland Cost?
The 9-foot garland I used for the base cost just $3.98, which is what made this project such a great alternative to purchasing multiple expensive, premade garlands.
The chicken wire provides the structure, while the greenery picks and decorative accents create the fuller, more custom appearance.
Your total cost will depend on how large you make your garland and how many decorative stems you add.
You can also save money by reusing greenery, ornaments, and lights you already own. I already had chicken wire from a previous Halloween DIY, so that was free!
In total, I spent around $160 total for everything!
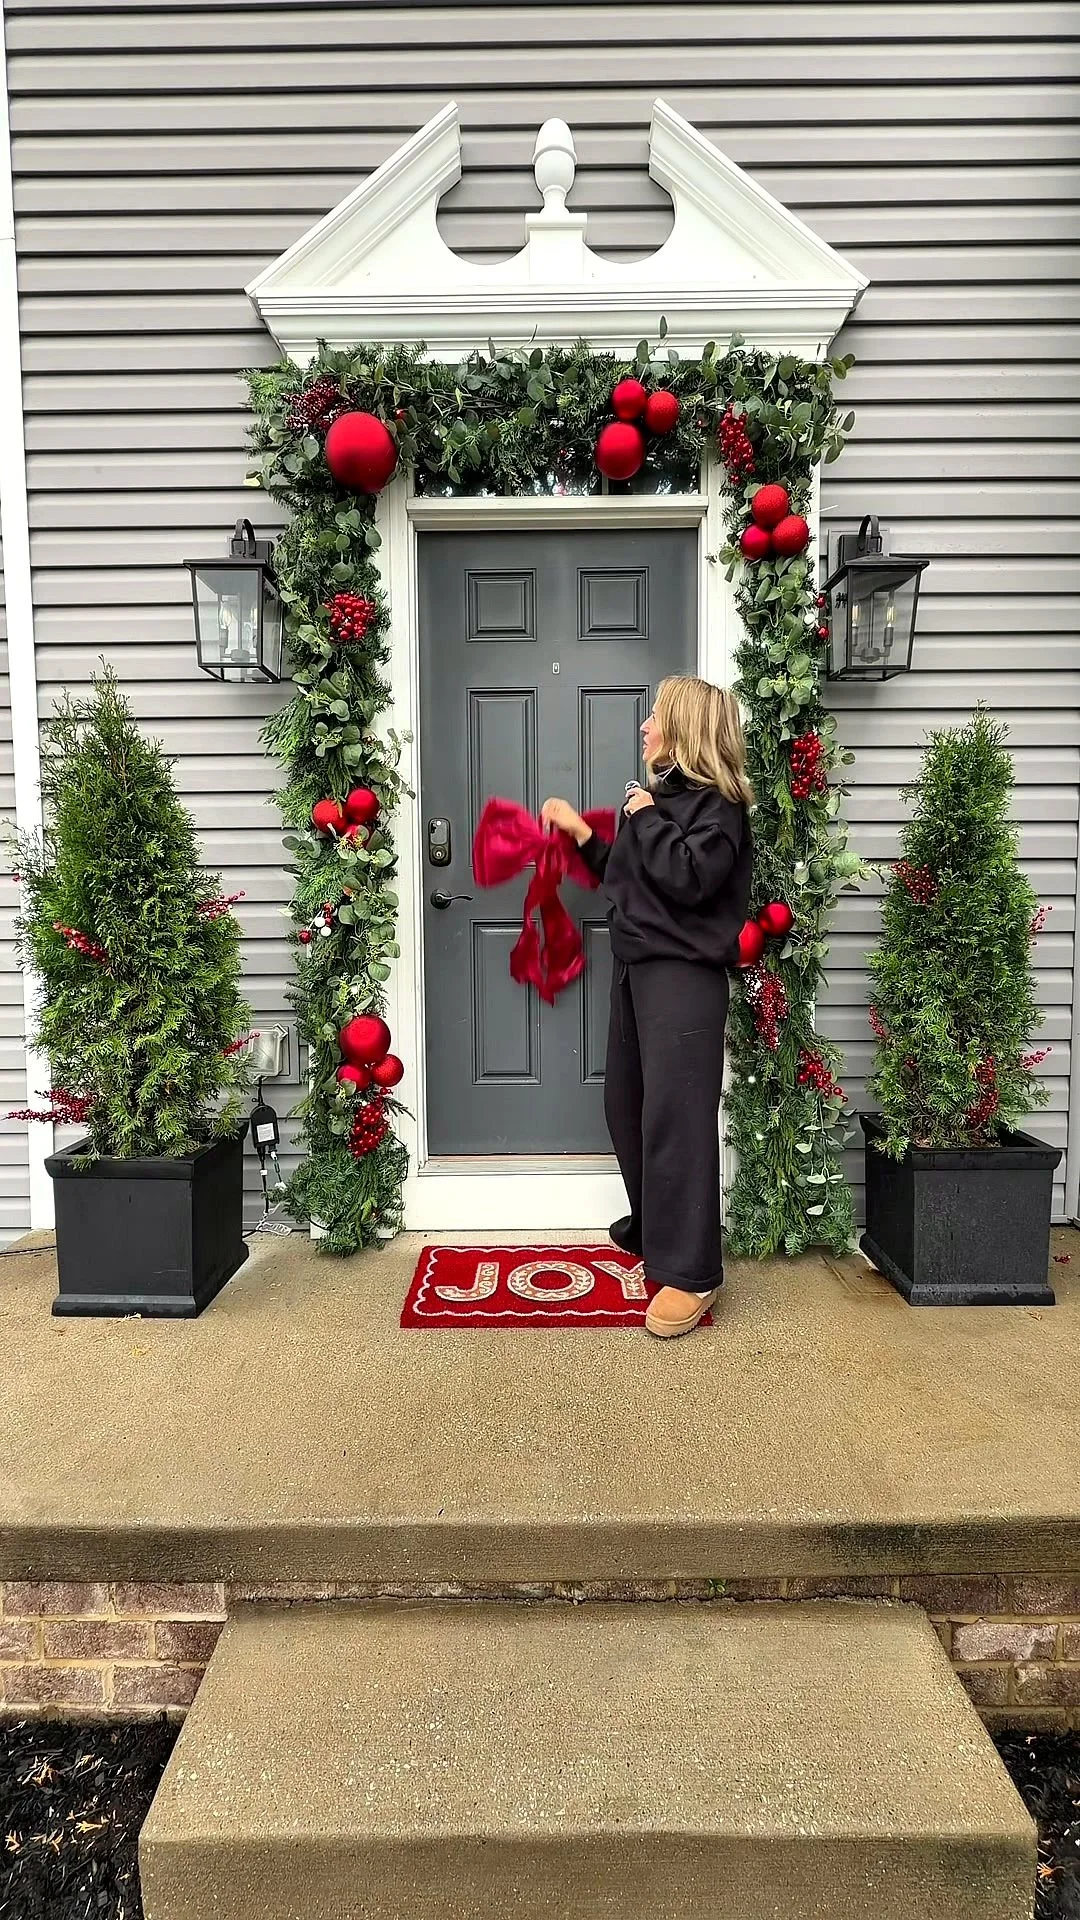
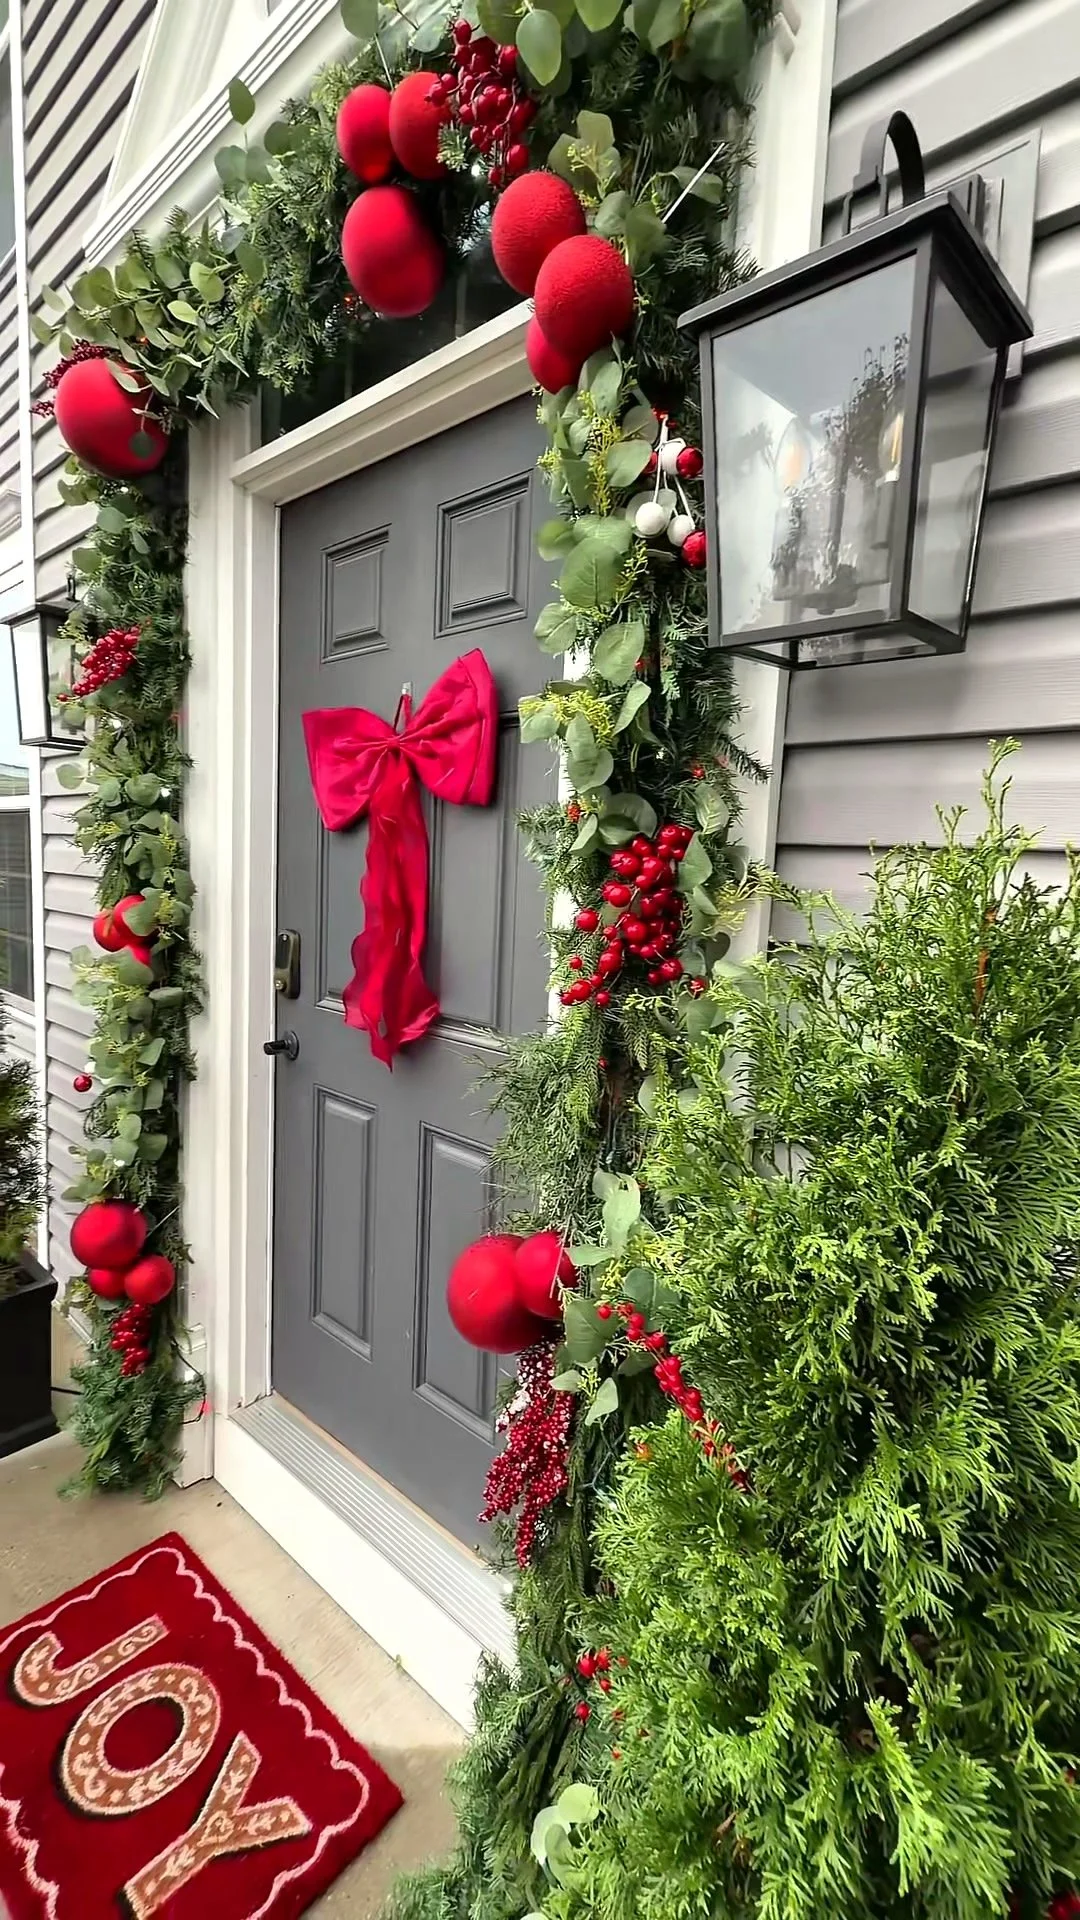
Is Making Your Own Christmas Garland Worth It?
For me, absolutely!
I love being able to customize the size, shape, and style instead of settling for whatever is available in stores.
And the best part is that I can reuse this garland year after year, changing out the decorative stems or ornaments whenever I want a different look.
If you love the oversized, designer-inspired Christmas garlands but don't love the designer prices, this is such a fun DIY to try.
Happy building!
Ashley