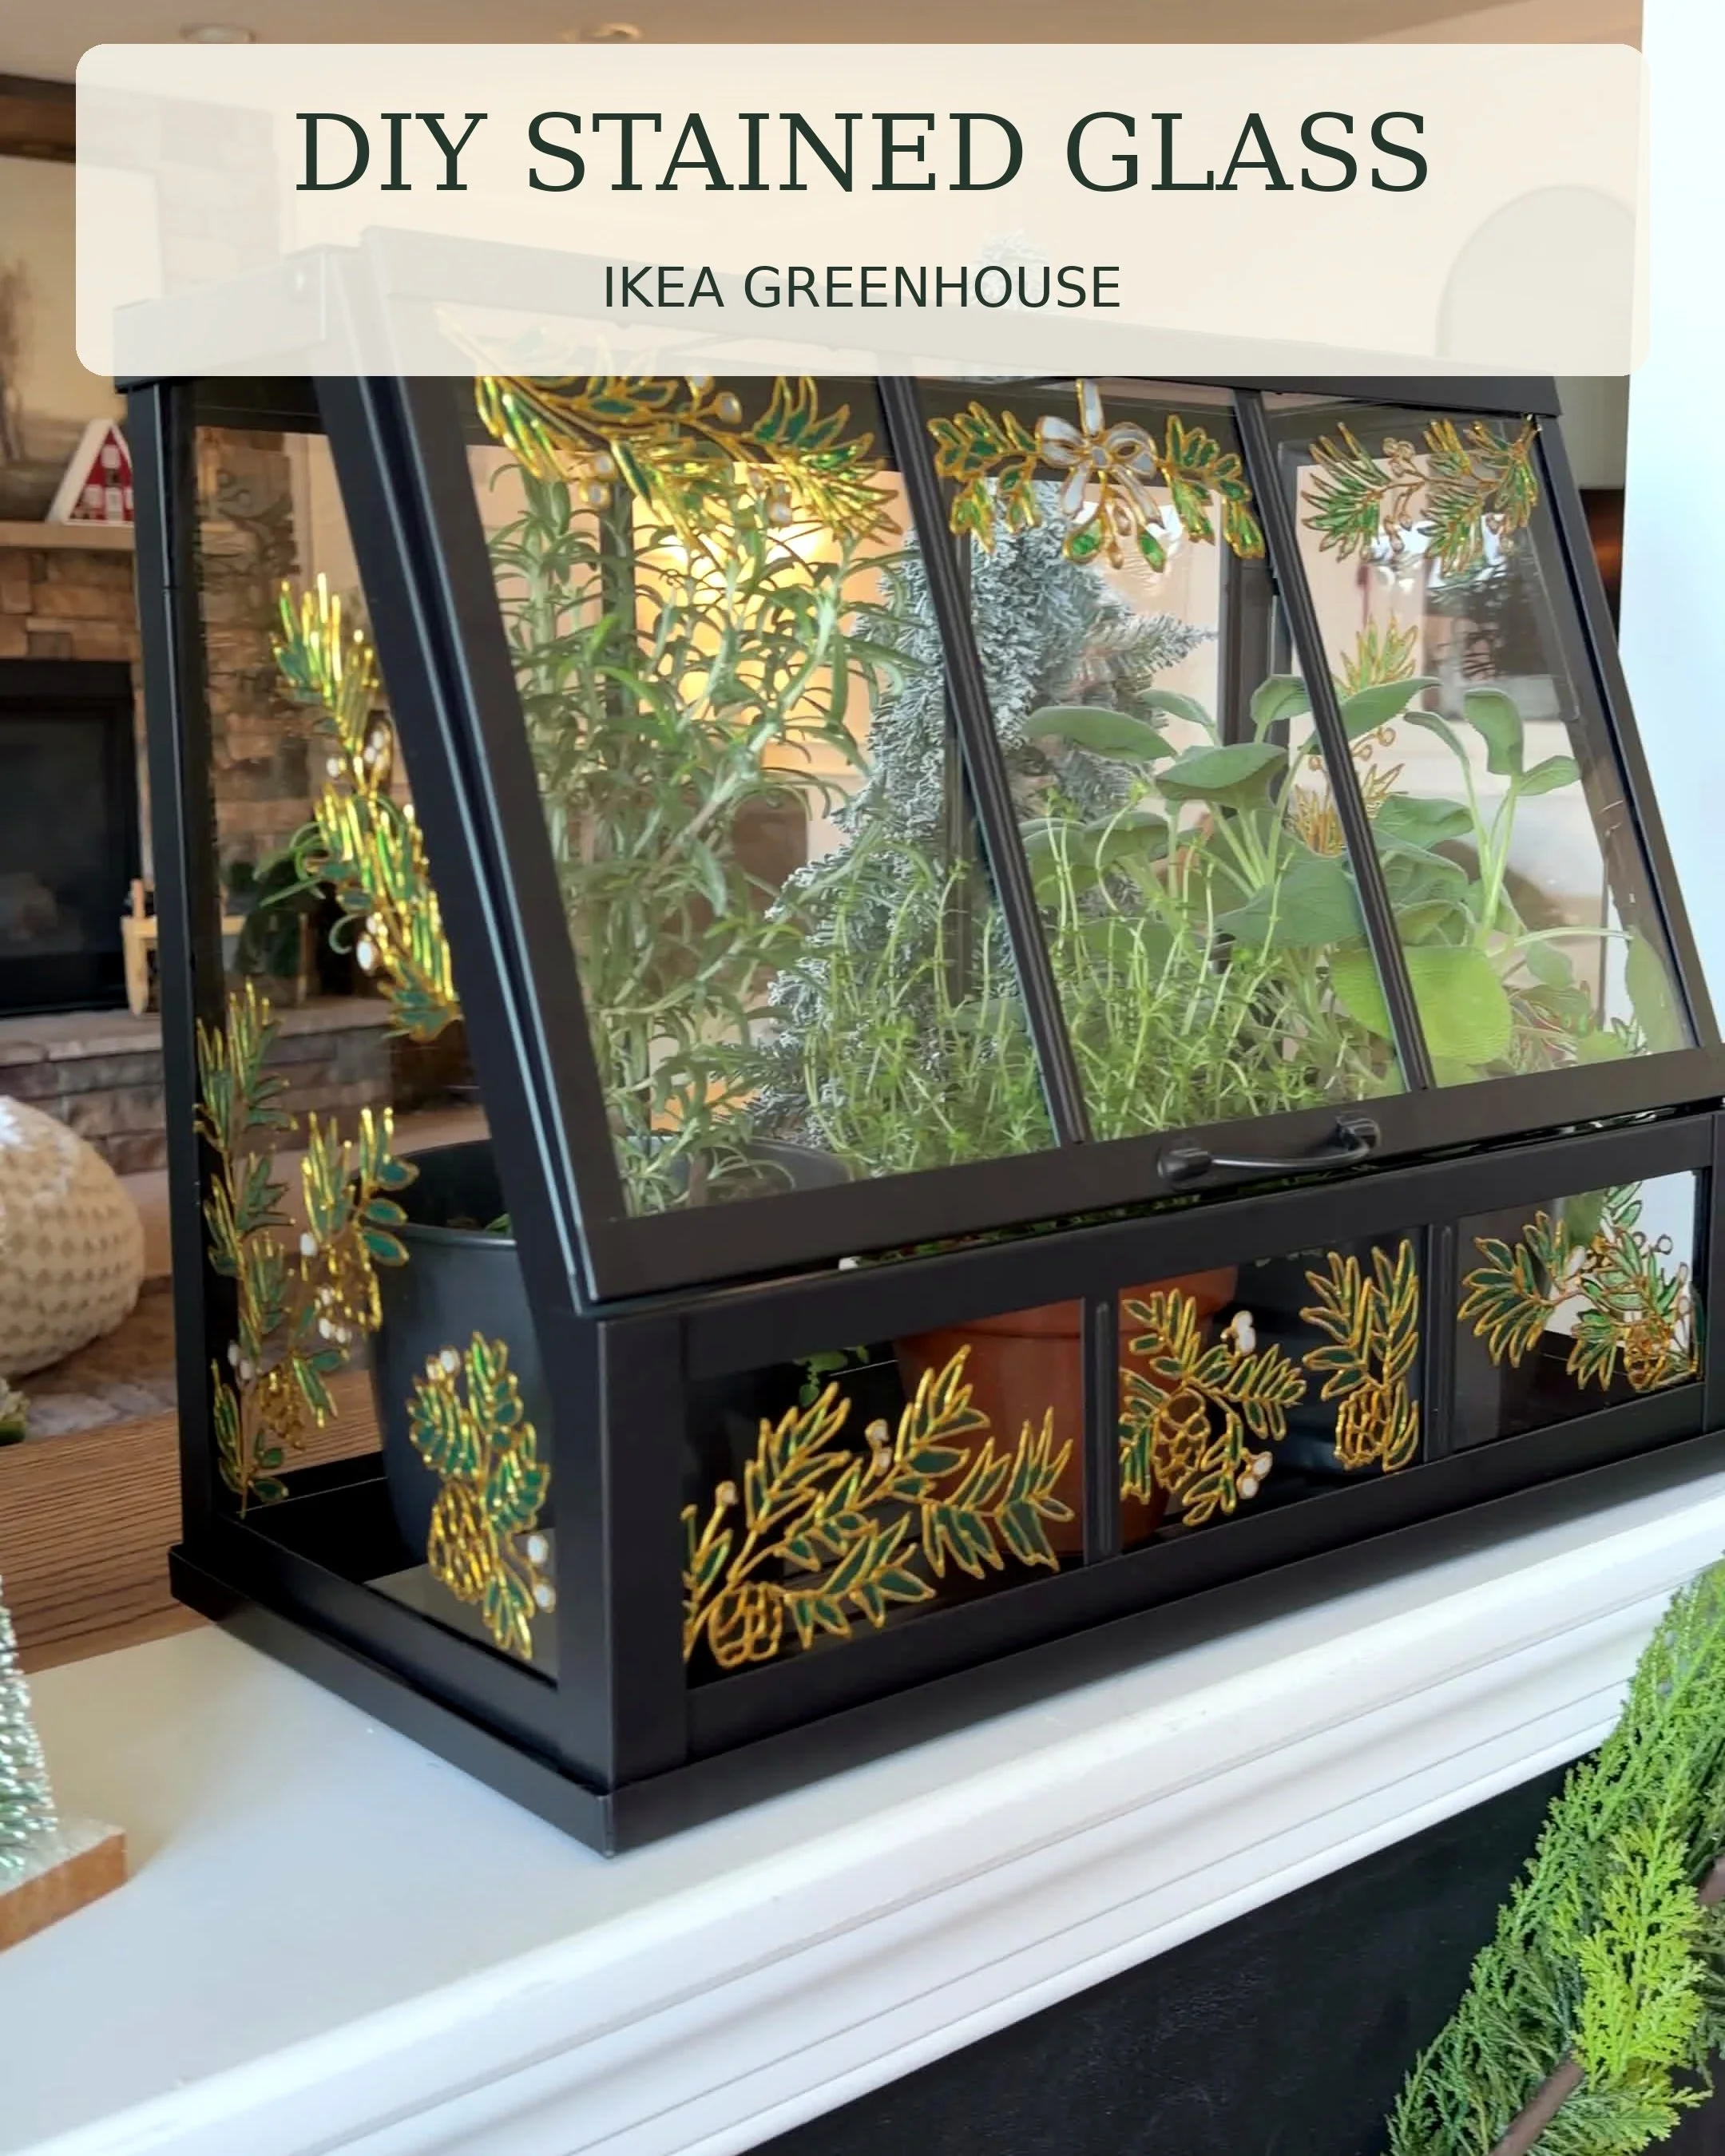
If you love giving handmade gifts but want them to look like something you'd find in a boutique, this DIY is for you!
Welcome to Day 1 of Gifts by Ashley, my series where I'm attempting to make homemade gifts that don't actually lookhomemade. And we're kicking things off with one of my favorite projects so far: a DIY stained glass-inspired greenhouse.
I took an affordable IKEA greenhouse, added a faux stained glass design, and turned it into a one-of-a-kind gift that's perfect for anyone who loves plants.
And the best part? You don't need to know how to work with real stained glass to make it.
What You'll Need
This project starts with the IKEA ÅKERBÄR greenhouse (17 3/4"). It's the perfect size for displaying a few small plants or herbs, and its clear panels give you plenty of room to customize. Shop everything here: https://shopmy.us/shop/collections/9223533
Materials:
Glass paint in ivy green, white, and clear
Printed or hand-drawn botanical design
Painter's tape
Rubbing alcohol and a lint-free cloth
Small potted herbs or plants to finish the gift
Tip: Use paint specifically designed for glass or suitable for the greenhouse's clear panel material. Check the product instructions for drying and curing times.
How to Make a DIY Stained Glass Greenhouse
Step 1: Assemble and Prep Your Greenhouse
I started with the IKEA ÅKERBÄR greenhouse and before painting, clean the clear panels to remove fingerprints, dust, or residue that might prevent the paint from adhering properly.
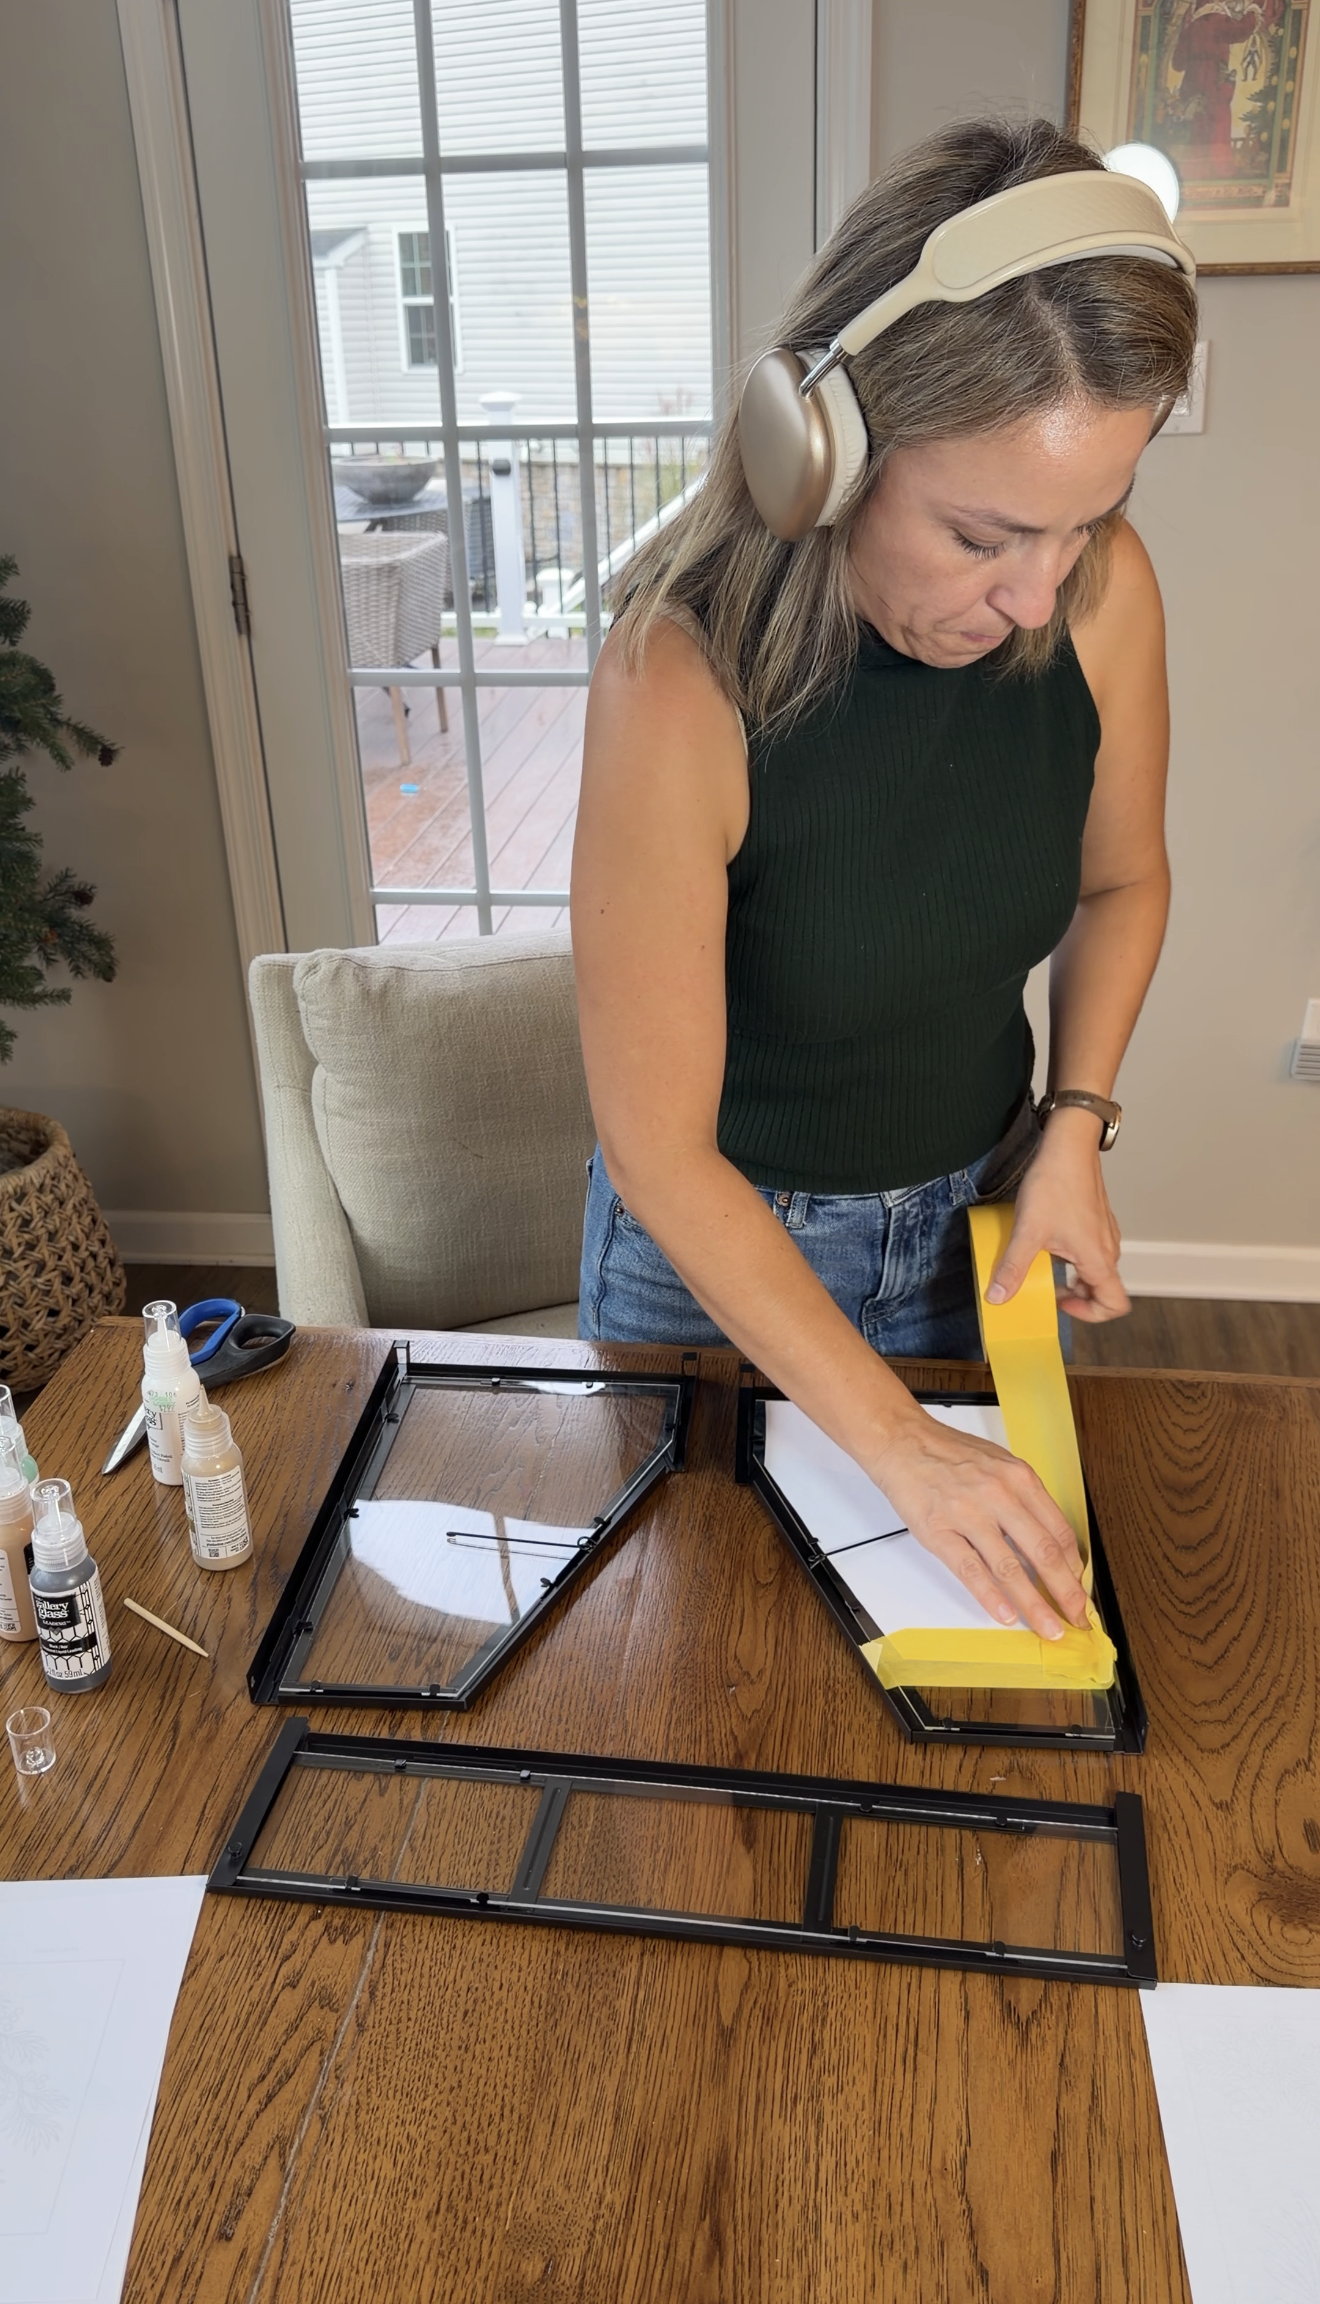
Make sure everything is completely dry before moving on. Don’t assemble the IKEA greenhouse as it makes it way easier to work on the glass while it is flat.
Step 2: Plan Your Stained Glass Design
For this project, I wanted something that felt festive for the holidays but could still be displayed year-round.
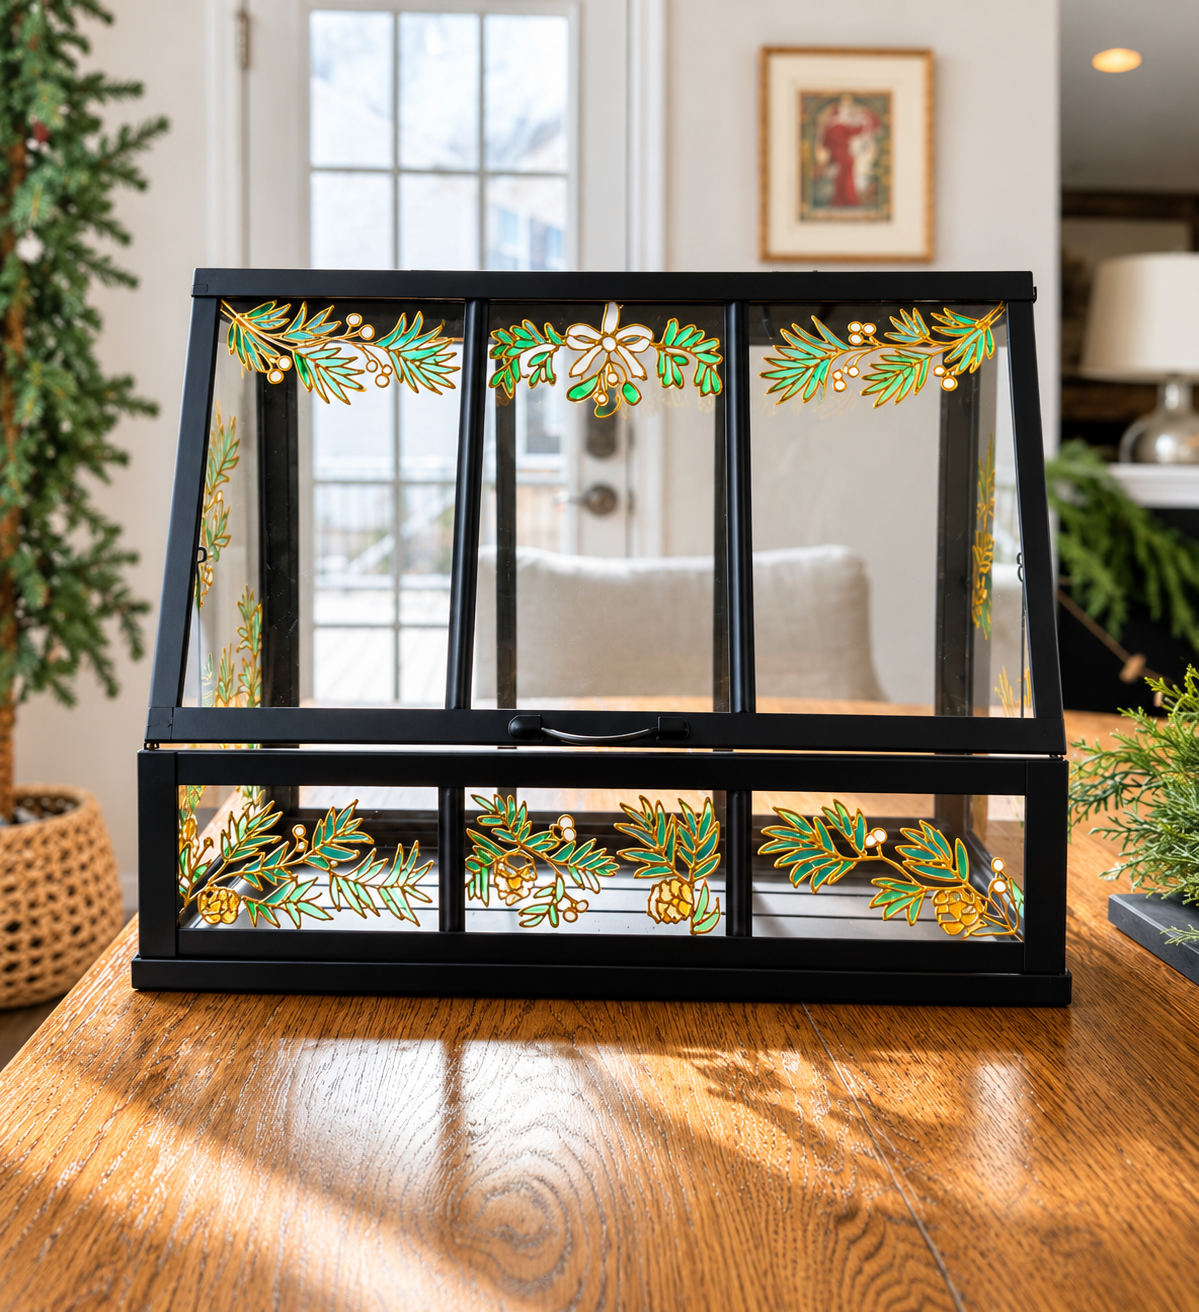
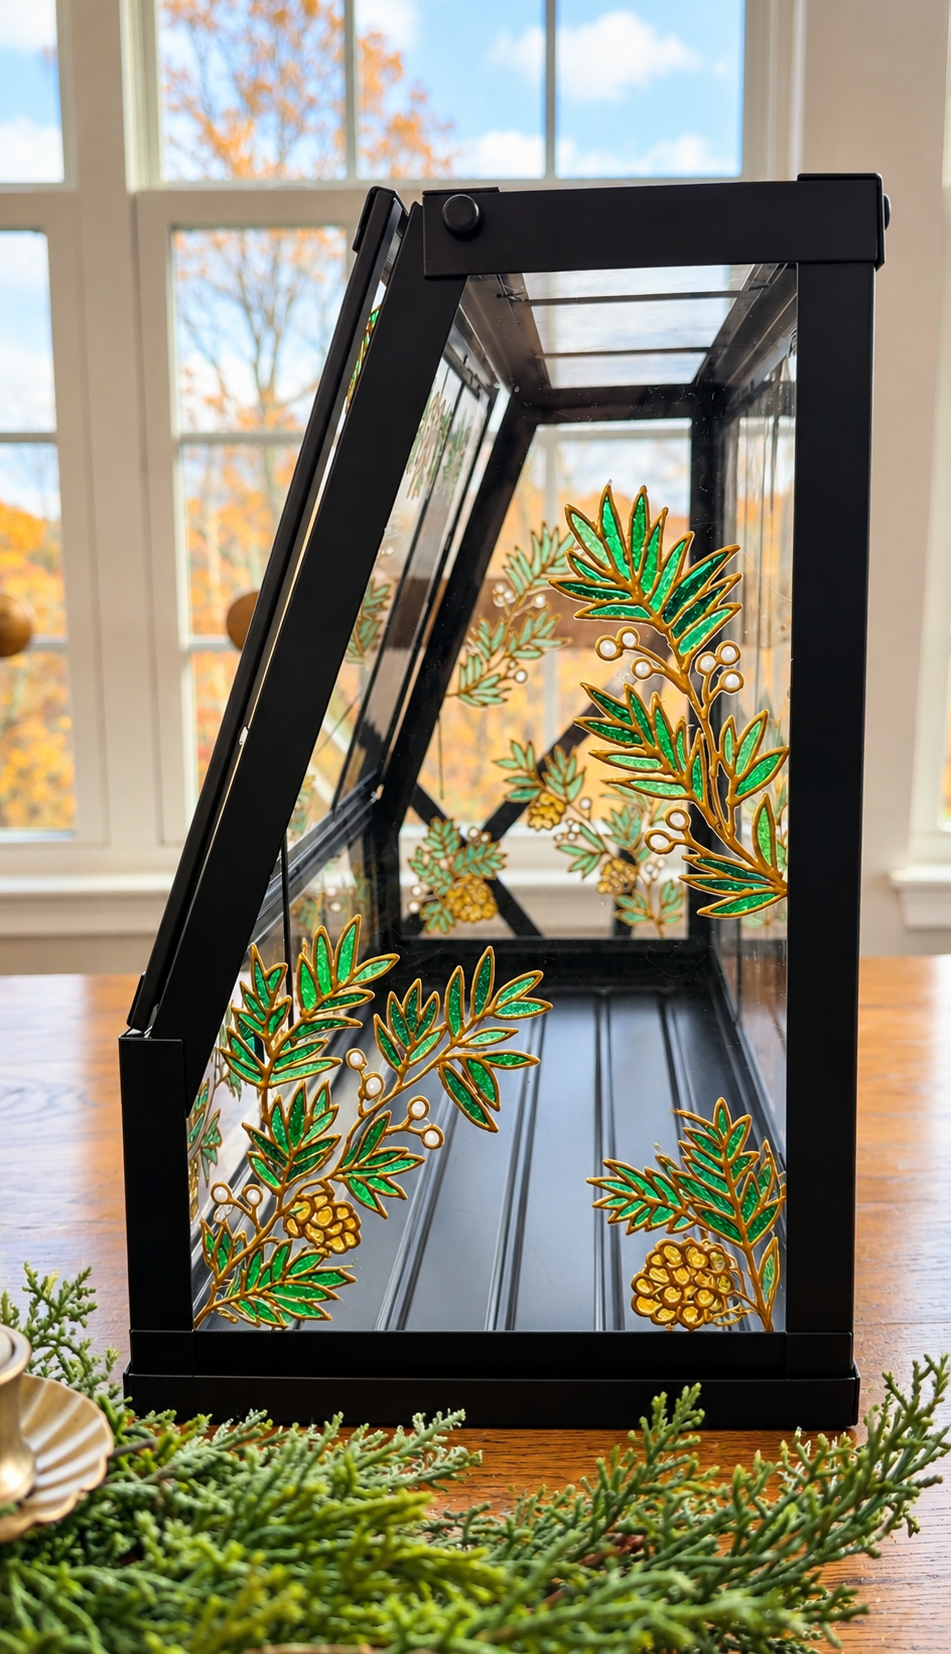
I went with a botanical-inspired design featuring pine branches, pinecones, delicate greenery, and little white details that resemble falling snow.
I kept the color palette simple with deep green, white, clear, and metallic gold accents.
My goal was to give the greenhouse a vintage stained glass look without making it feel too busy.
My biggest design tip: Don't feel like you need to cover every inch of glass. Leaving some areas clear allows the light to shine through and helps the finished piece look more intentional.
Want to recreate my exact greenhouse design? I've got you covered!
I created printable templates for the pine branches, pinecones, and botanical details I used on my IKEA greenhouse, and I'm sharing them with you for FREE!
No need to draw your own design or figure out where everything goes. Just download the templates, print them, and use them as a guide when adding your faux stained glass leading.
Get the free printable templates!
Enter your email below to join the Builds by Ashley newsletter, and I'll send the greenhouse templates straight to your inbox.
By signing up, you'll receive the free greenhouse templates plus occasional DIY projects, tutorials, and inspiration from Builds by Ashley. Unsubscribe anytime.
Once you've printed your templates, tape them behind your greenhouse panels and trace the designs to create your own stained glass-inspired greenhouse!
Step 3: Create the Faux Stained Glass Outlines
Once I had my design planned out, I used faux stained glass leading to trace the outlines.
This is the step that really makes the project start looking like stained glass!
I used gold leading paint because it looked so good with the black of the greenhouse! This part is necessary because it’s what keeps the paint only within that area (aka creating borders).
If you're using a printed design as a guide, tape it behind the clear panel so you can trace directly over it.
Take your time with this step. Smooth, consistent lines make a big difference in the finished result.
Allow the leading to dry according to the manufacturer's instructions before adding color.
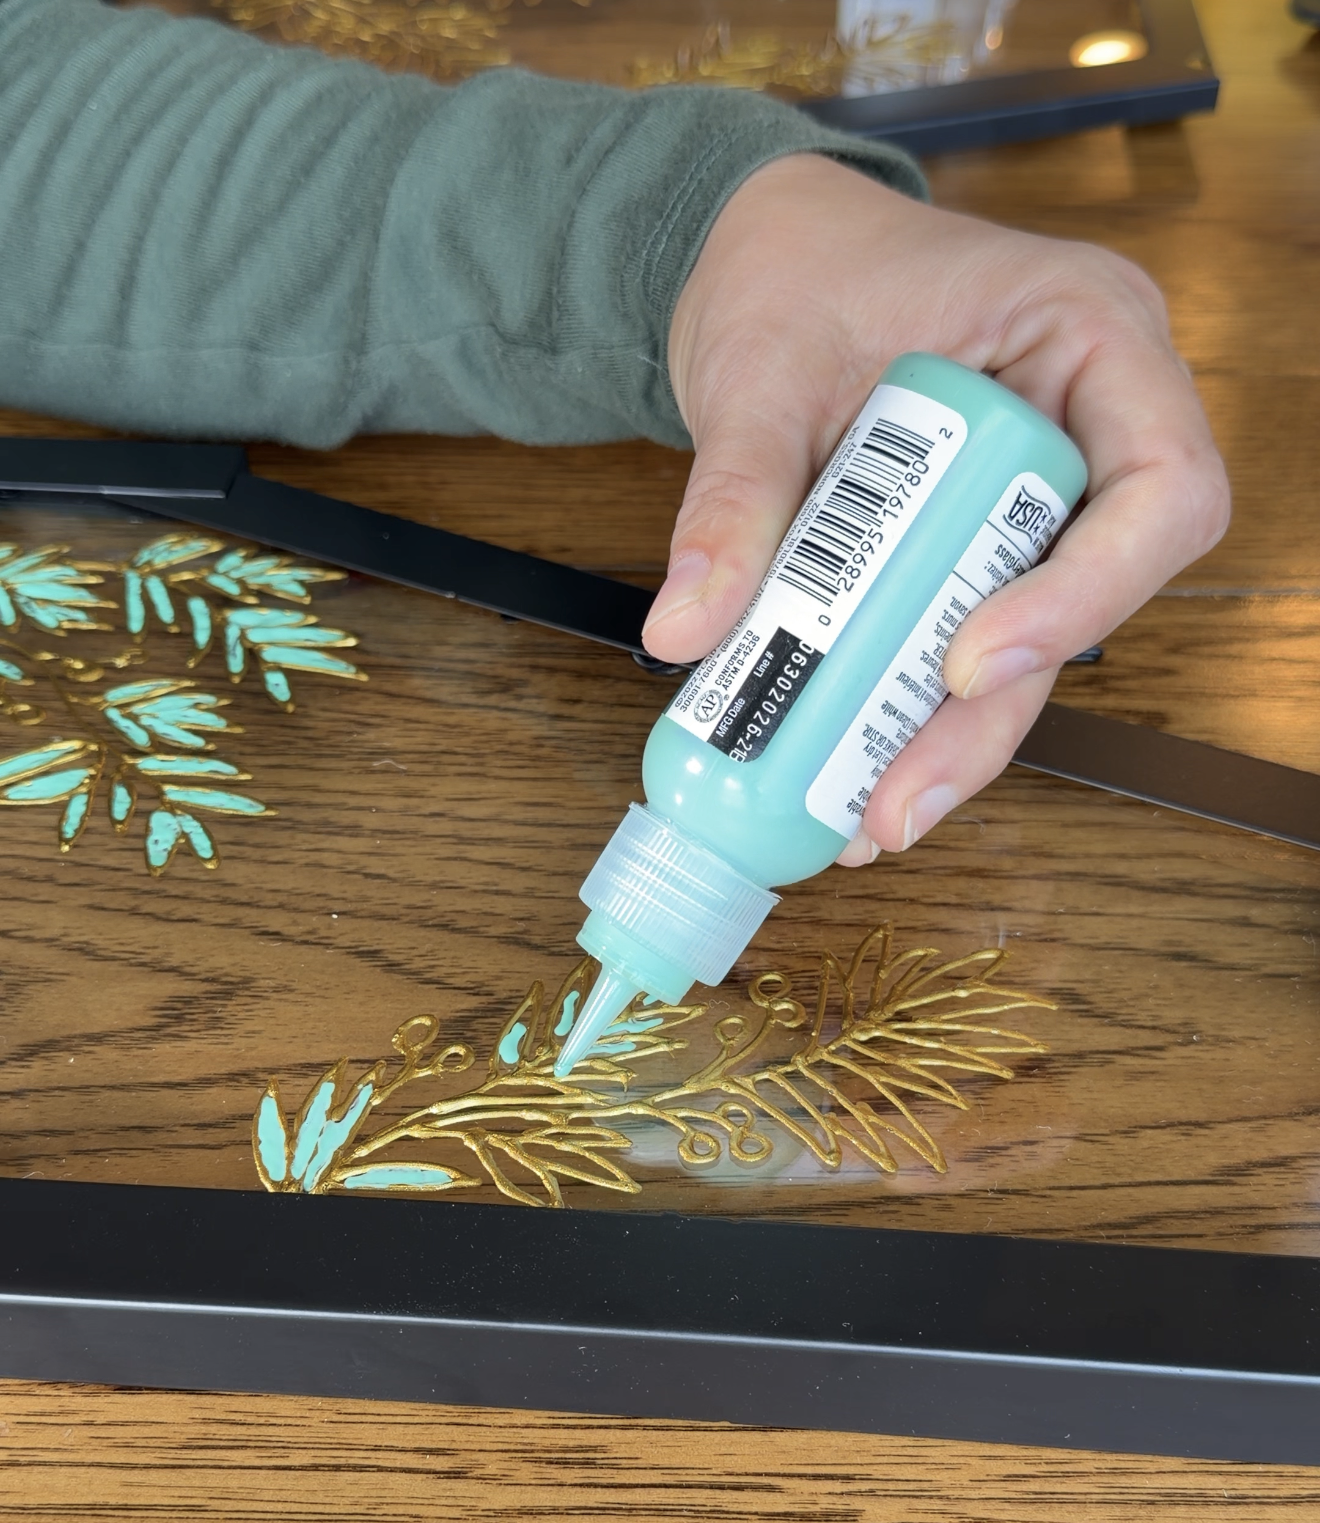
Step 4: Fill In the Design With Color
Next came my favorite part: adding the color!
I used an ivy green shade for the greenery, white for some of the smaller details, and clear areas to keep the design light and airy.
Rather than using a ton of different colors, I stuck with a limited palette to make everything feel cohesive.
The combination of the green glass effect and gold accents gives it that slightly vintage, almost antique look that I love.
Let the paint settle naturally within the outlines, and avoid overworking it once it's applied.
Step 5: Let Everything Dry
This is definitely a project where patience pays off.
Let each painted area dry completely before handling or reassembling anything. Follow the paint manufacturer's curing recommendations, especially if you plan to give the greenhouse as a gift.
You'll also want to avoid getting water or cleaning products directly on the painted sections unless your specific paint is rated for that exposure.
Step 6: Add Herbs or Small Plants
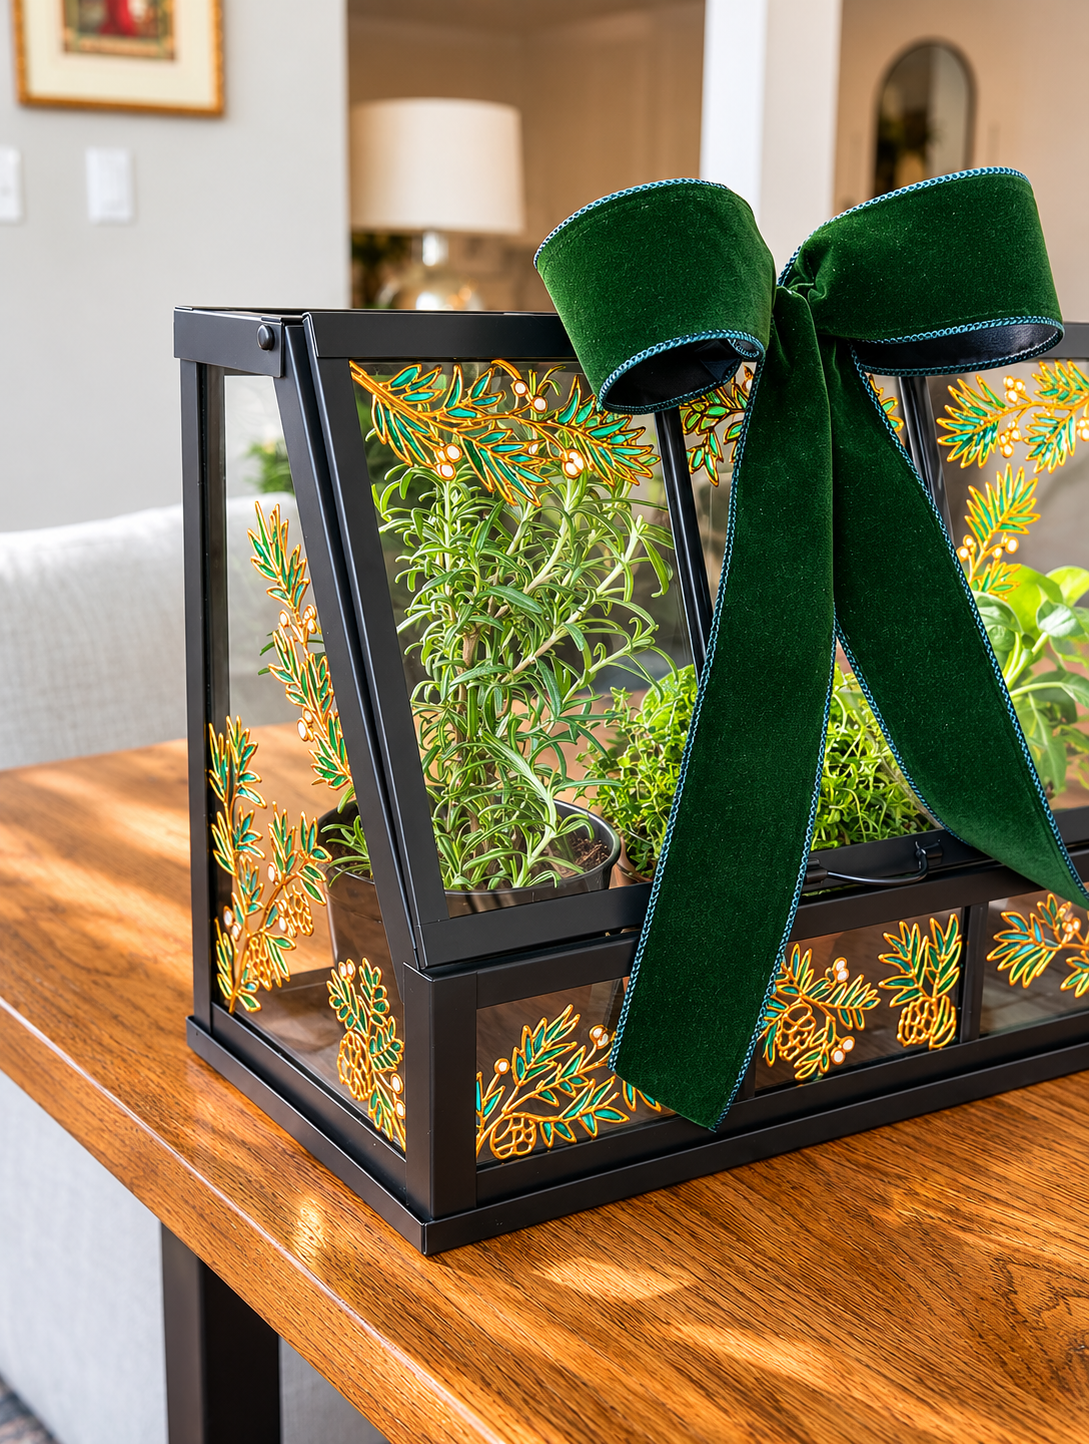
To turn this from a pretty DIY project into an actual gift, I added a few small herbs inside.
I love this finishing touch because it makes the greenhouse feel complete. Plus, it's a gift the recipient can enjoy long after the holidays are over.
You could also fill it with succulents, small houseplants, or even a few seed packets and gardening accessories.
Now I just have to keep the herbs alive until it's time to give it away!
Tips for Making Your DIY Greenhouse Look Store-Bought
Since the whole point of my Gifts by Ashley series is to create handmade gifts that don't look overly homemade, I paid extra attention to a few things:
Stick to a limited color palette. Too many colors can make a design feel cluttered. The green, white, clear, and gold combination kept this project looking classic.
Choose a repeating theme. Using botanical elements throughout the greenhouse helped tie the different panels together.
Leave some negative space. The clear sections are just as important as the painted ones. They allow light to come through and keep the greenhouse functional.
Don't rush the outlines. Clean leading lines help give the illusion of real stained glass.
Think about the final presentation. Adding plants made this feel like a finished gift rather than just a decorated greenhouse.
Who Would Love This Handmade Gift?
I think this would make a great gift for a plant-loving friend, mom, sister, teacher, or anyone who appreciates unique home decor.
You can also personalize the design to match the recipient. Think florals for someone who loves gardening, delicate vines for a more traditional look, or even a seasonal design.
And while I created mine as part of a holiday gift series, this is absolutely something you could give for a birthday, housewarming, or Mother's Day.
Final Thoughts
I have to say, I absolutely love how this greenhouse turned out.
When I started this series, my biggest goal was to create gifts that felt thoughtful and handmade without necessarily looking homemade.
I think this one gets pretty close!
The stained glass effect gives a simple IKEA greenhouse so much personality, and adding the herbs at the end made it feel extra special.
Would you give this as a gift, or would you keep it for yourself?
Be sure to follow along with my Gifts by Ashley series for more DIY gift ideas that look like they came straight from a store!
Happy building!
Ashley | Builds by Ashley