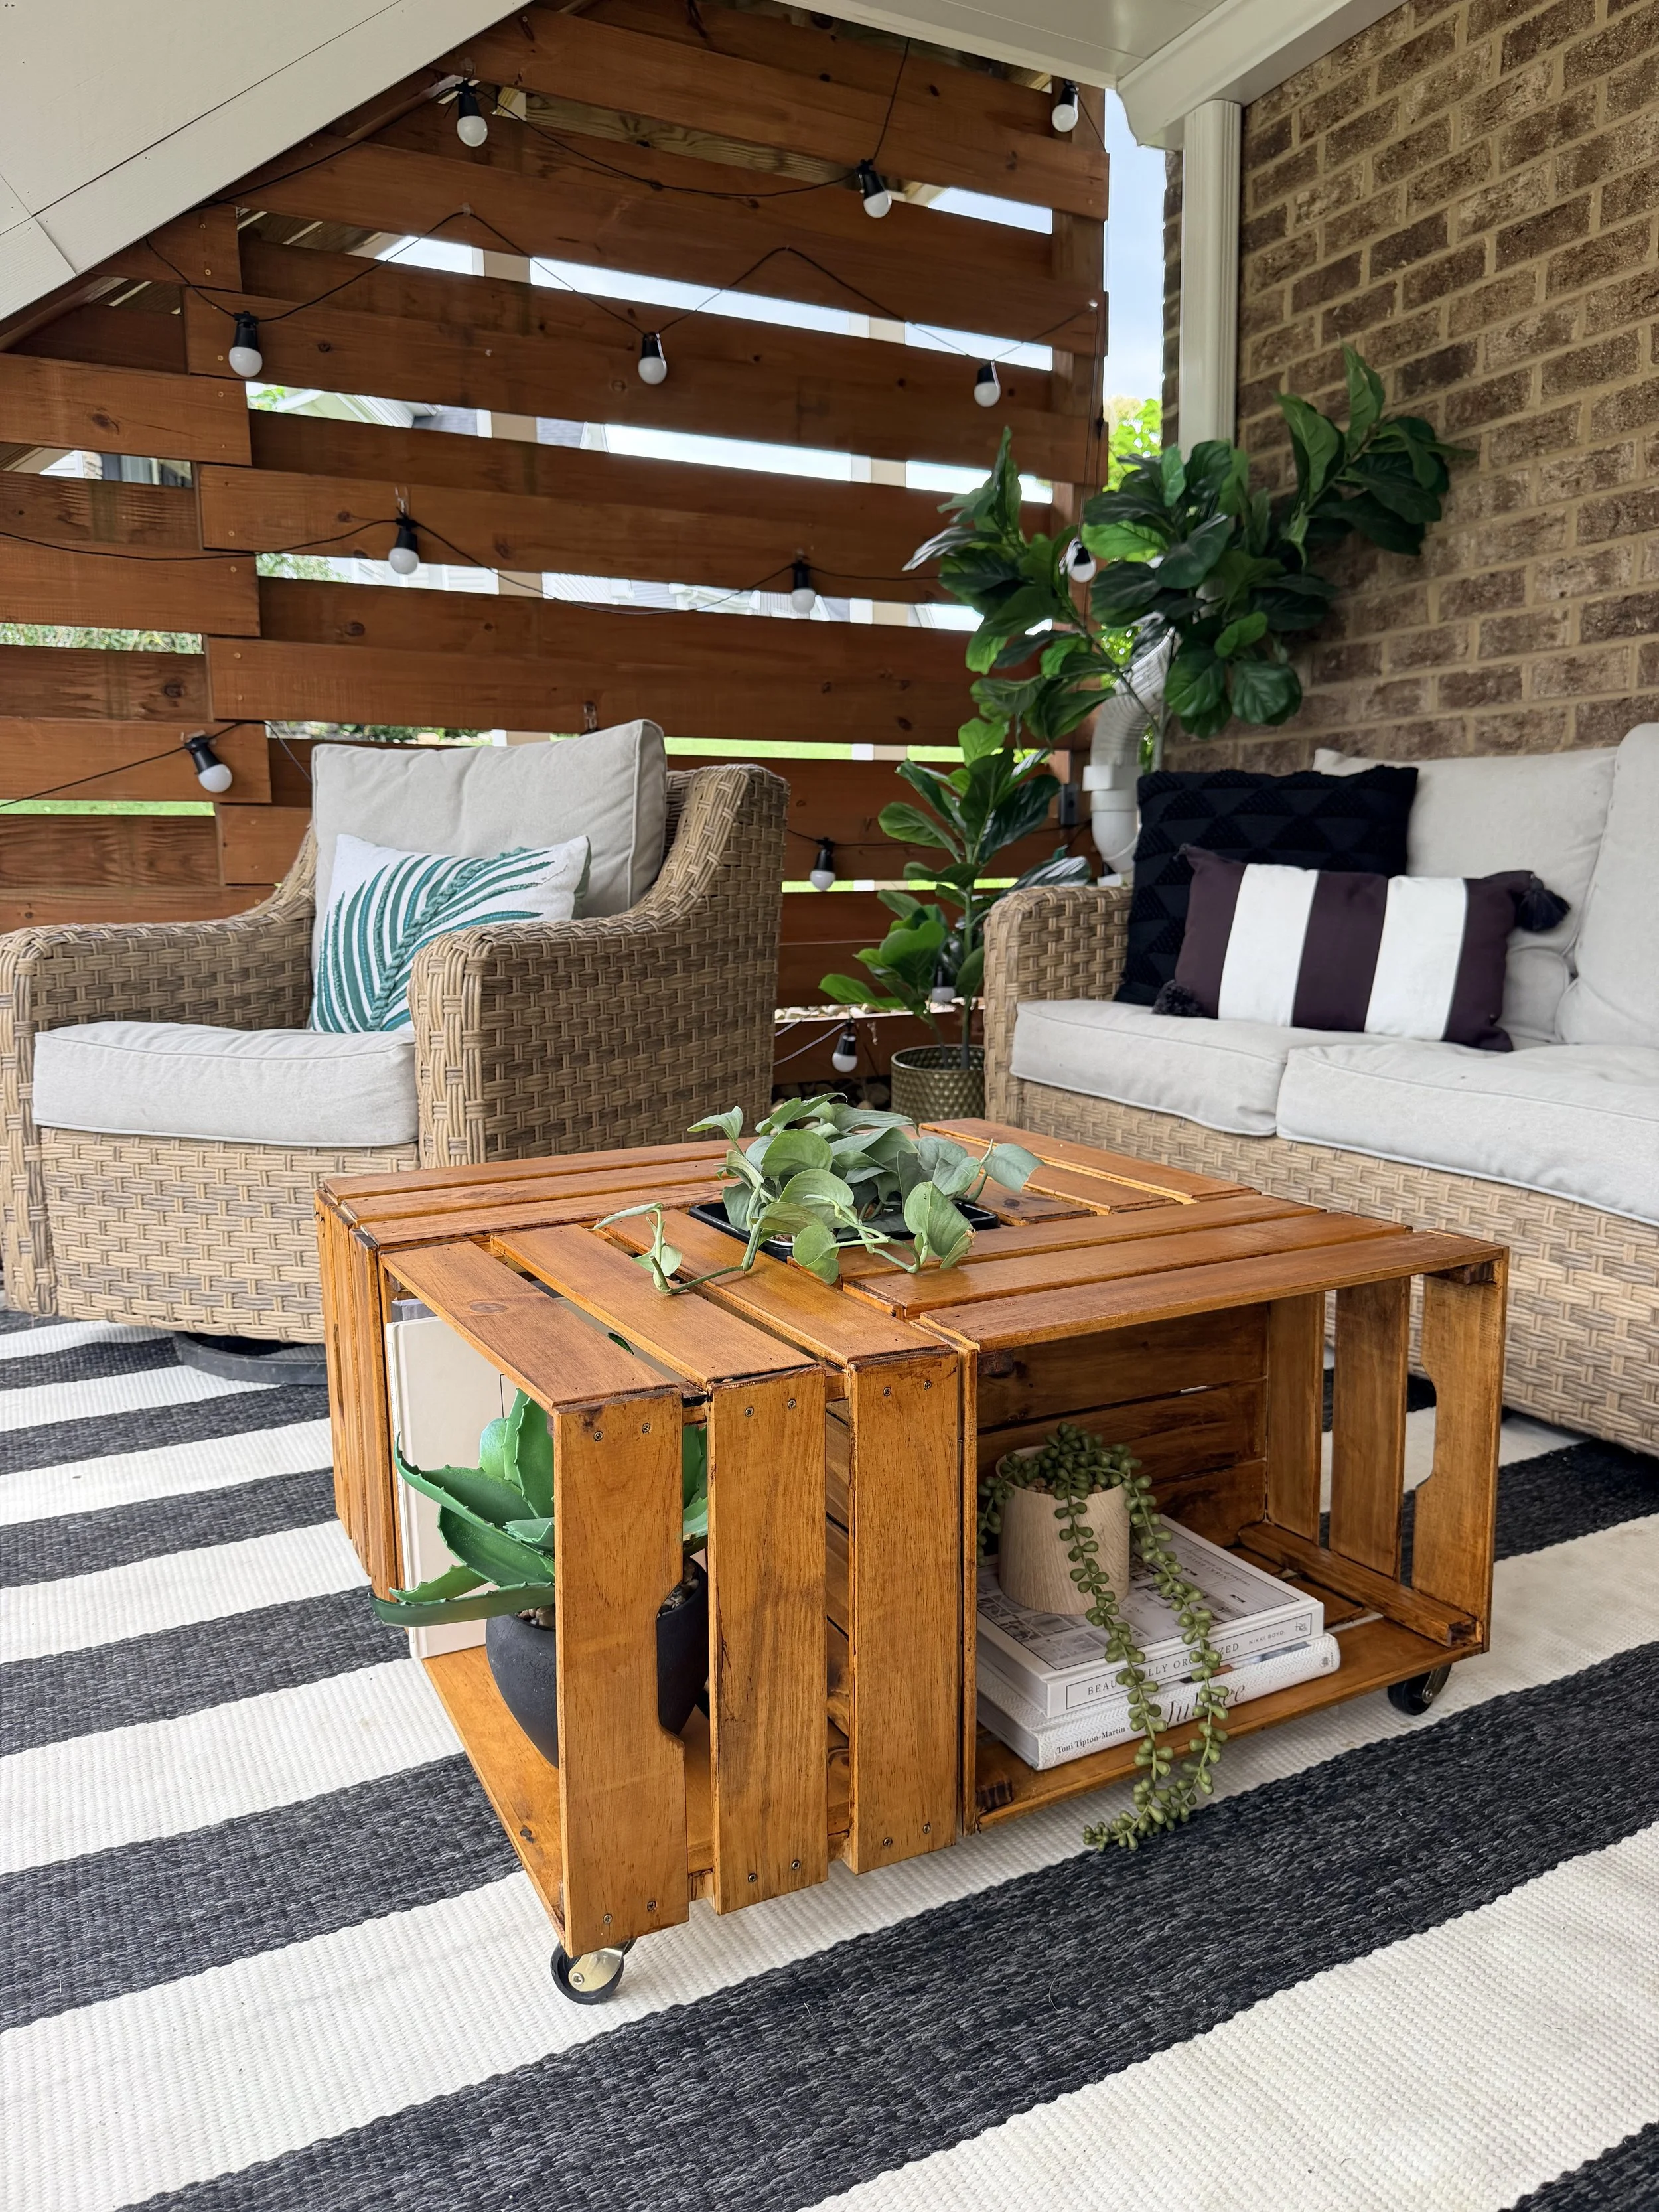
What if you could turn four basic IKEA wooden crates into a functional outdoor coffee table with built-in storage, wheels, and a center you can completely customize?
That's exactly what I decided to make for a DIY Flip Battle, where I was challenged to take the IKEA KNAGGLIG wooden crates and turn them into something entirely different.
And I didn't want to make just another basic crate table.
I wanted something that looked intentional, offered useful storage, and could actually serve multiple purposes on a patio or deck.
So I arranged four crates into a pinwheel design, added wheels, stained everything, and created a removable planter area right in the middle.
The result? A functional outdoor coffee table that can hold plants, drinks, and all those random things that seem to accumulate outside.
And the best part is that you don't need to build the entire table from scratch. The IKEA crates do most of the heavy lifting!
Here's exactly how I made it.
Why This IKEA Crate Hack Works So Well
One of my favorite things about this project is that every part of the design serves a purpose.
Instead of building a traditional coffee table with a solid base, I positioned the crates so their openings face outward.
That gives you four convenient storage compartments without having to build extra drawers or shelves.
Then, because the crates create an opening in the center when arranged together, I decided to turn that space into an interchangeable feature.
You could fill it with plants, add a removable drink container, or change it up depending on how you're using the table.
It's one of those projects where the design ends up being just as practical as it is pretty.
Materials & Tools You'll Need
You don't need an overwhelming list of supplies for this project.
Shop everything here: https://shopmy.us/shop/collections/8398206
4 IKEA KNAGGLIG wooden crates
Optional extra crate for spare wooden slats
Wood glue
1-inch and 1¼-inch finish or brad nails, depending on the connection
Nail gun
4 caster wheels and appropriate mounting screws
220-grit sandpaper
Exterior-grade spray-on stain
Scrap wood for the center supports
Planter pots or a removable container sized to fit the center opening
My advice: Assemble your crates and measure the finished layout before purchasing the planter containers. That way you know exactly what will fit.
How to Build an IKEA Crate Coffee Table
Step 1: Assemble Your IKEA Crates
I started by assembling four IKEA KNAGGLIG wooden crates.
One thing worth mentioning is that these come disassembled, so you'll need to put them together before building the table.
Once assembled, I noticed that the lower edges of the crates weren't completely flush.
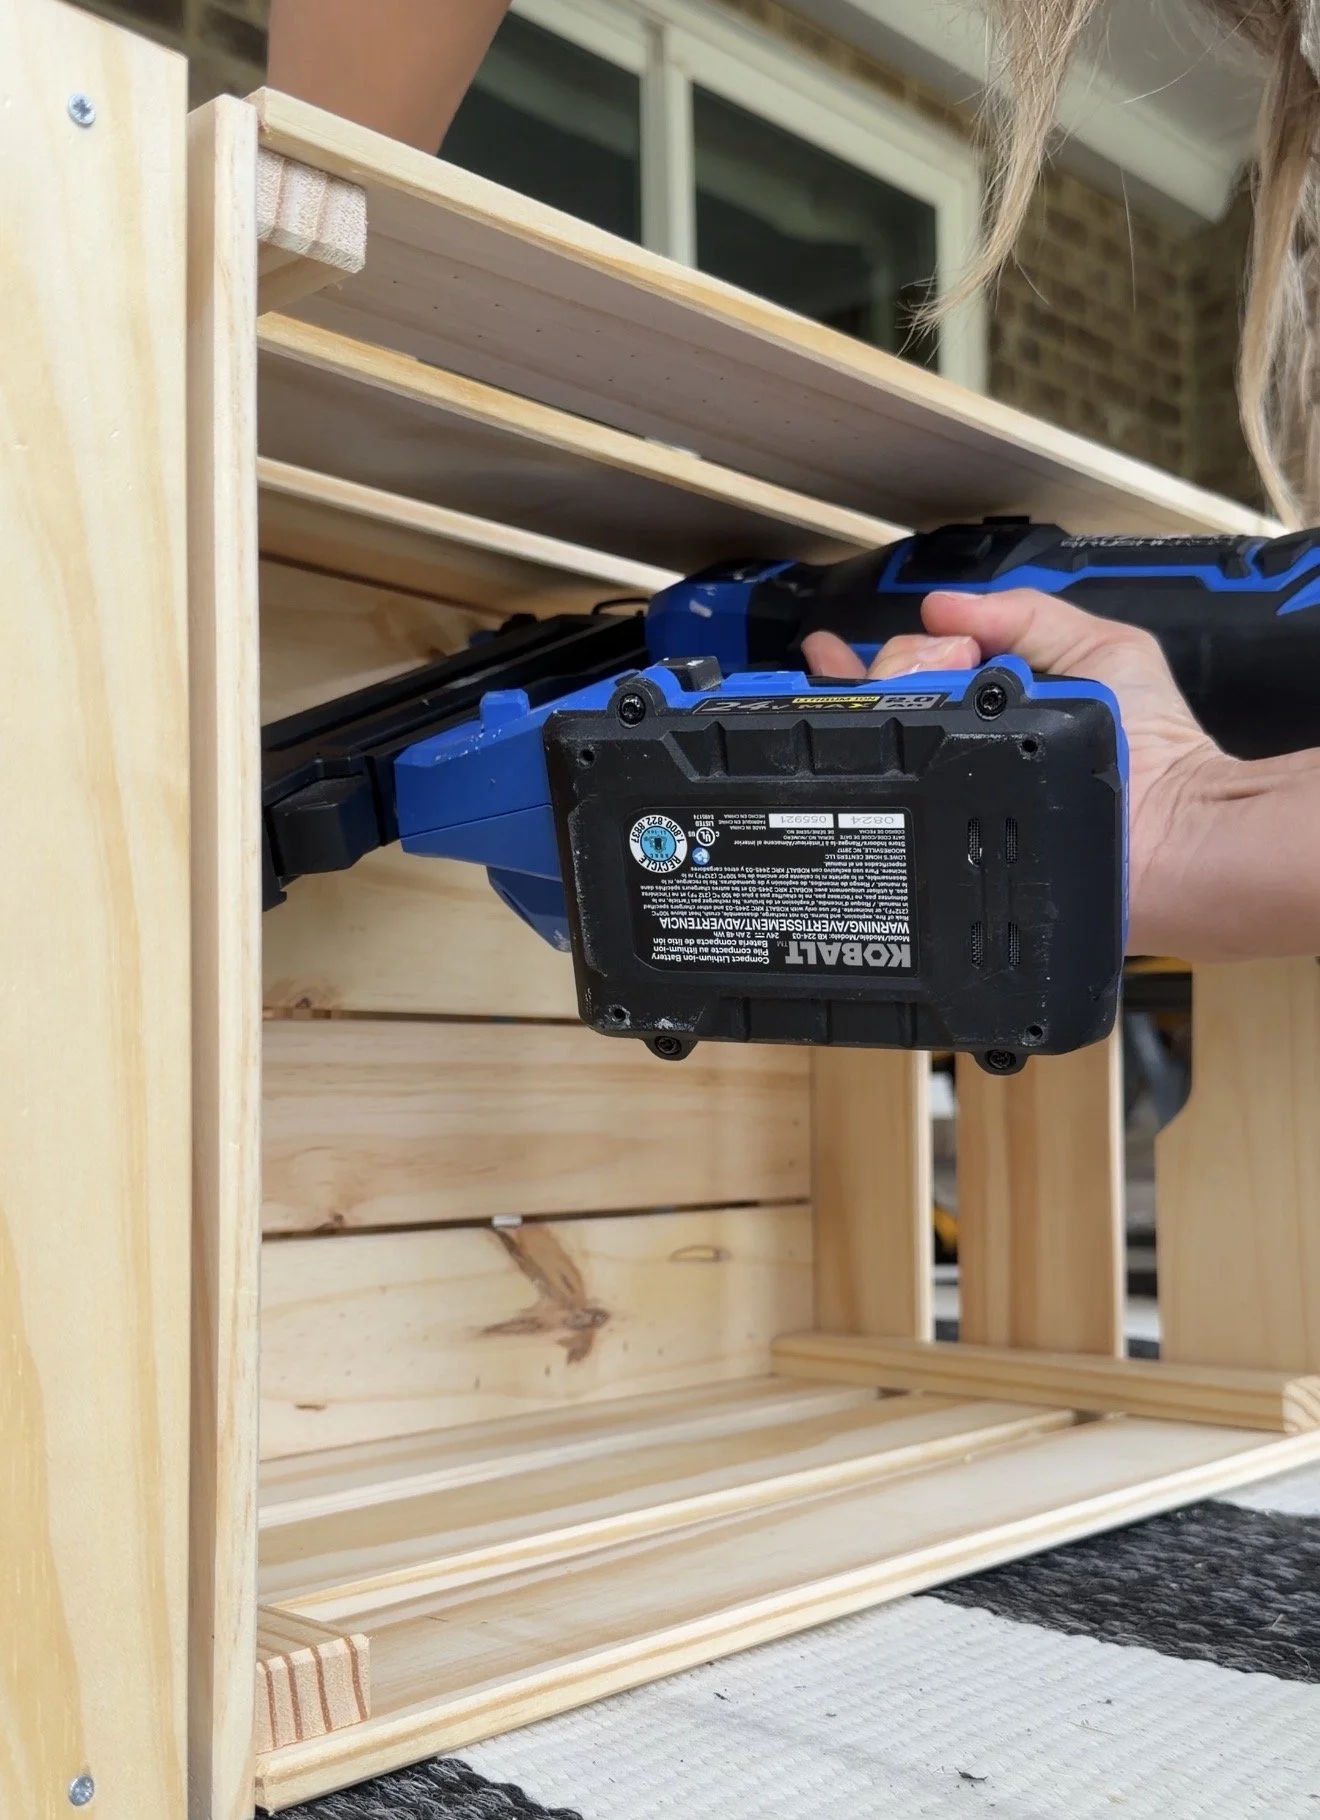
Since I had some extra crate pieces available, I took apart an additional crate and used those wooden slats to fill in the recessed areas.
I attached them using my nail gun.
Do you have to do this? No!
But I liked having a flatter surface to work with because it made connecting the crates easier and gave the base some additional support.
If you're trying to keep the cost down, this is a step you can skip.
Step 2: Arrange Your Crates in a Pinwheel Pattern
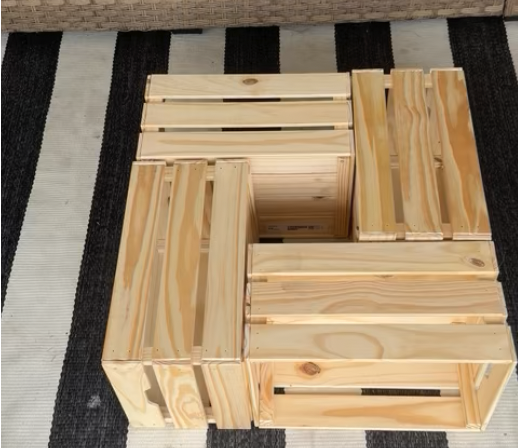
This is where the whole project starts coming together!
Take your four assembled crates and arrange them in a square, rotating each one so the open storage compartments face outward.
You'll end up with a pinwheel-like layout and an open square in the center.
That center opening is important because we're going to use it later for the interchangeable planter feature.
Before attaching anything, make sure all four crates are positioned correctly and the outside edges line up.
Once I was happy with the arrangement, I applied wood glue to the surfaces where the crates touched and secured them with finish nails (and wood glue!).
Builder tip: Dry-fit everything first! It's much easier to adjust the layout before you've added glue and nails.
Also, make sure your connections are secure enough for the table's intended use. The crates are originally designed for storage, so avoid assuming they can support someone sitting or standing on the finished table.
Step 3: Add Caster Wheels for Height and Mobility
I wanted this table to be easy to move around my outdoor space.
And because the crates sit fairly low on their own, adding caster wheels served two purposes: it raised the overall table height and made it mobile.
I flipped the assembled table over and attached four caster wheels near the outside corners.
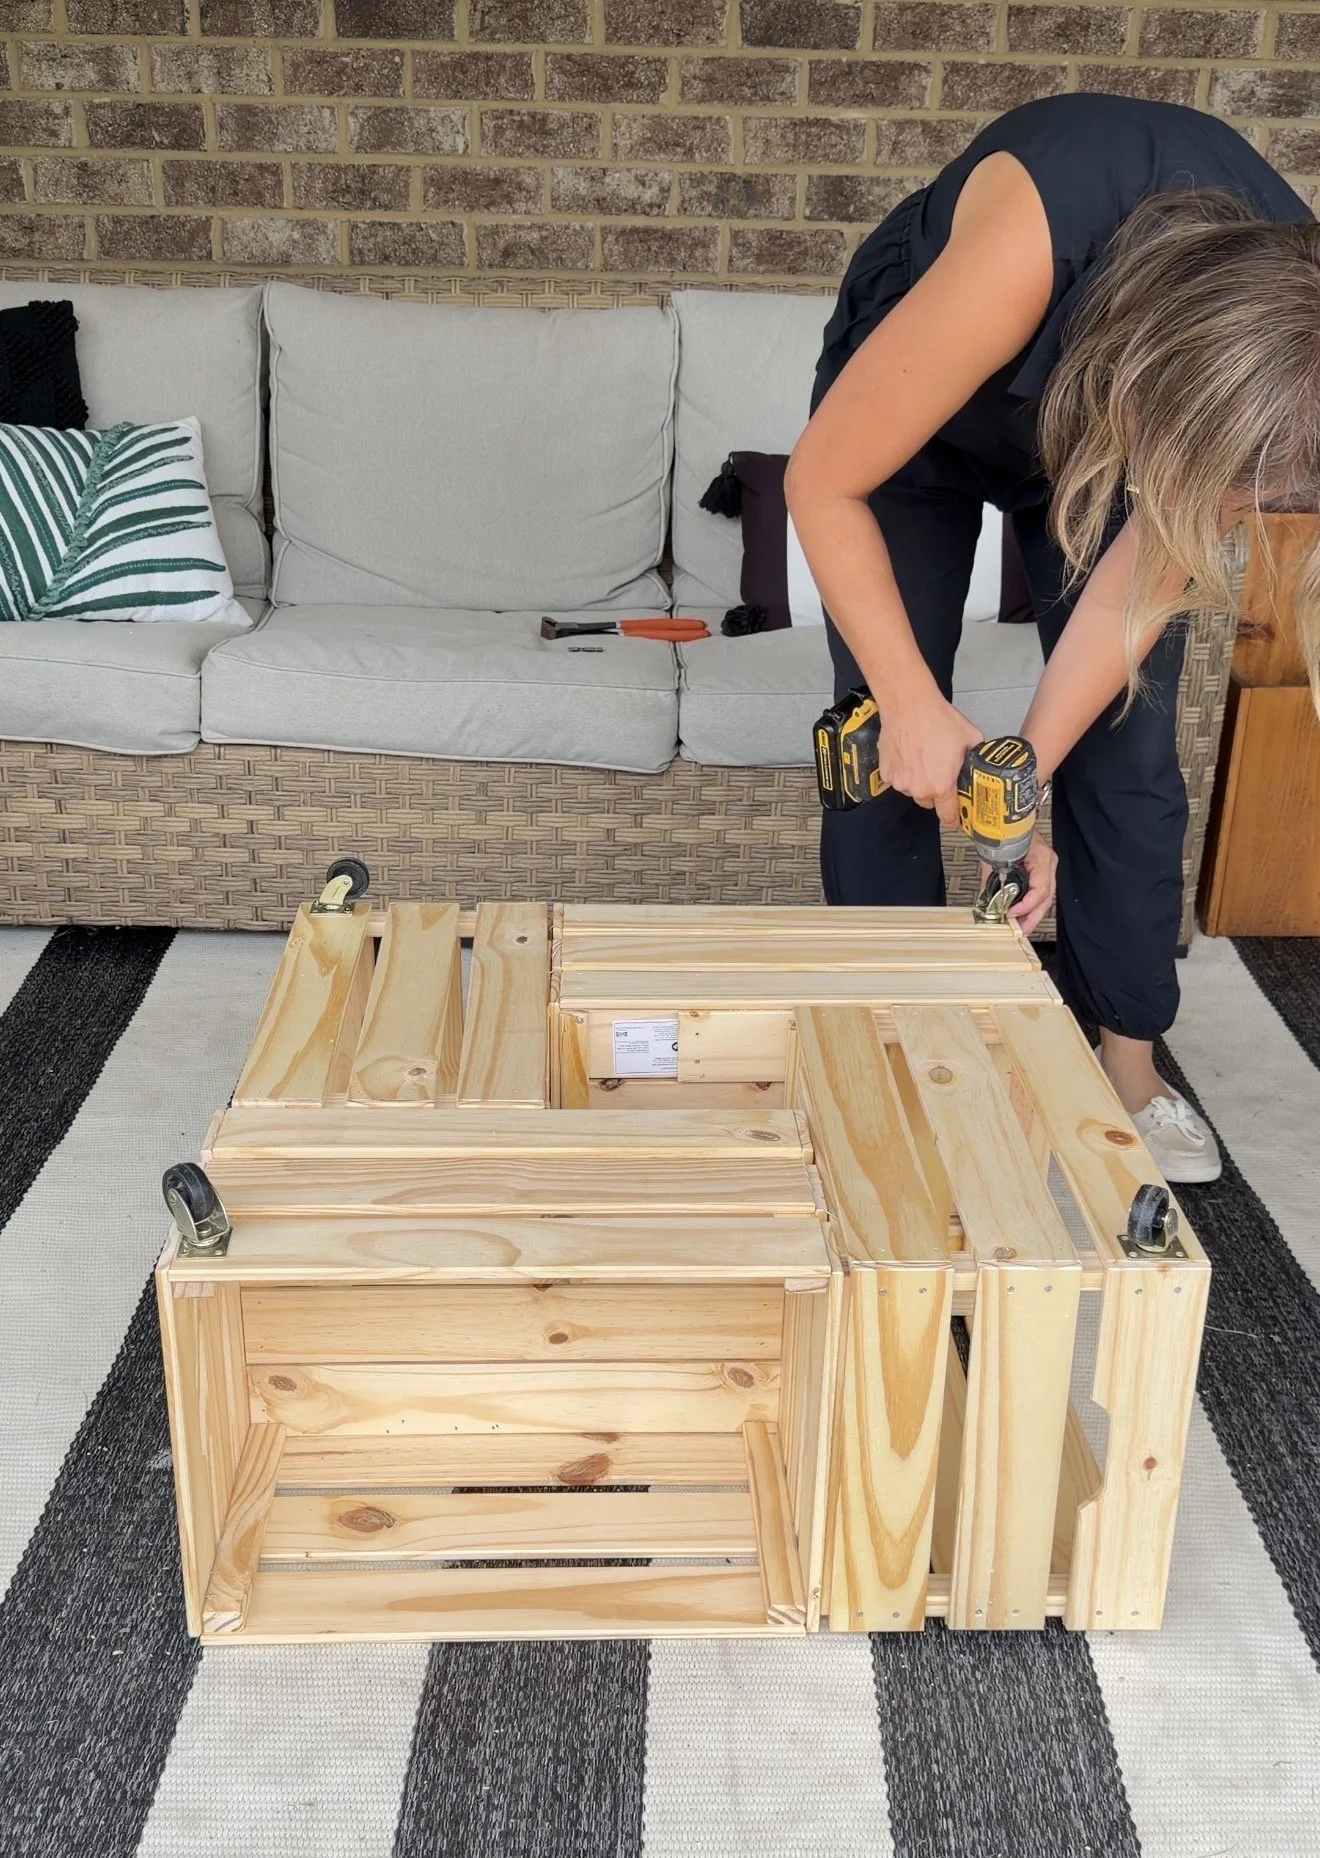
Before installing your wheels, check that your screws are the correct length for the wood and that the mounting points have enough support.
If you're using the table outside, look for wheels suited to your patio surface and consider locking casters to help keep it in place.
Why I love this addition: You can easily move the table when rearranging outdoor furniture or cleaning the patio.
Step 4: Sand and Stain the Table
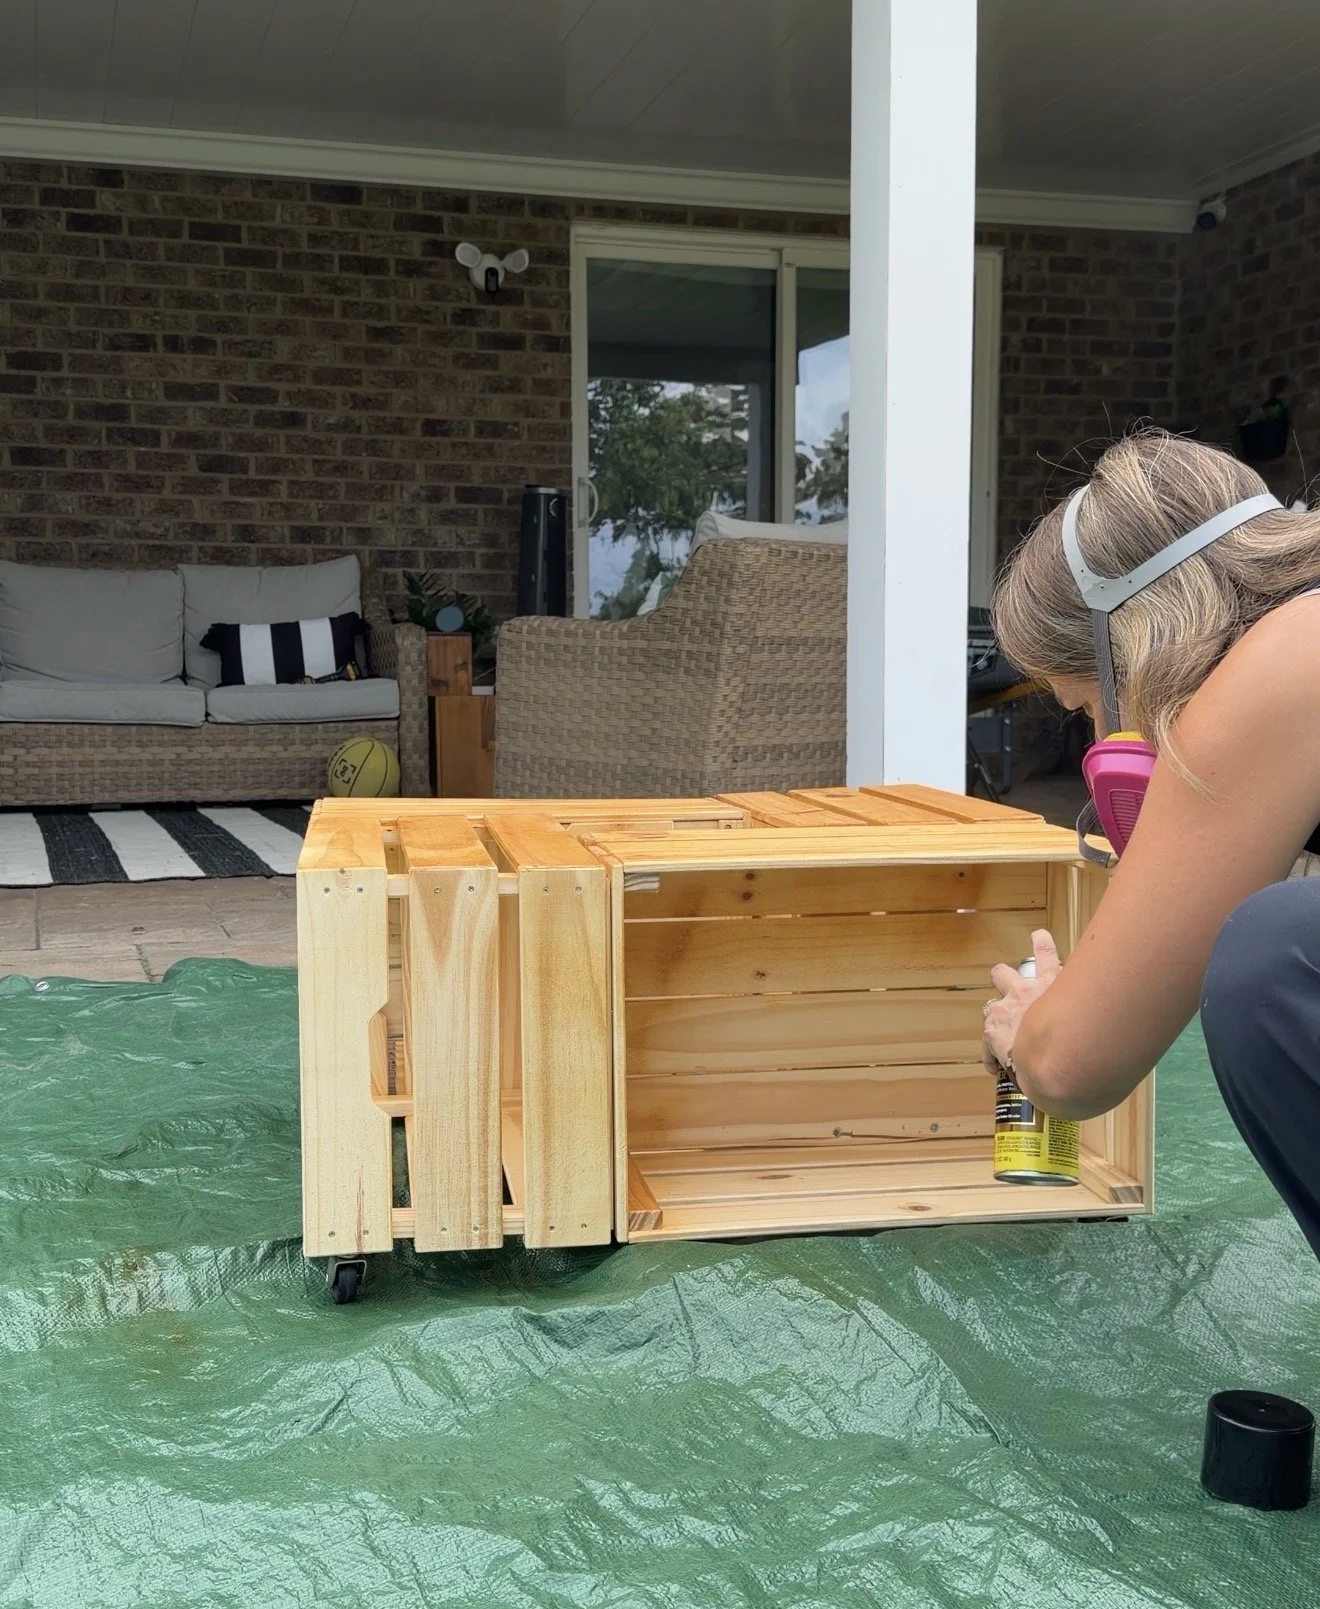
Now for the part that makes four IKEA crates start looking like one cohesive piece of furniture.
I gave everything a quick sanding with 220-grit sandpaper before applying the stain.
I chose an exterior-grade spray-on stain, and I am so glad I did!
If you've ever tried staining wooden crates by hand, you know how time-consuming it can be to get into every little space between the slats.
Spraying made the process much easier, especially around all those narrow openings and corners.
Follow your stain manufacturer's instructions for application, drying, and outdoor use.
One thing I'd do differently: I'd install the small center supports in the next step before staining everything. That way you can finish the entire table at once.
Step 5: Create the Interchangeable Center
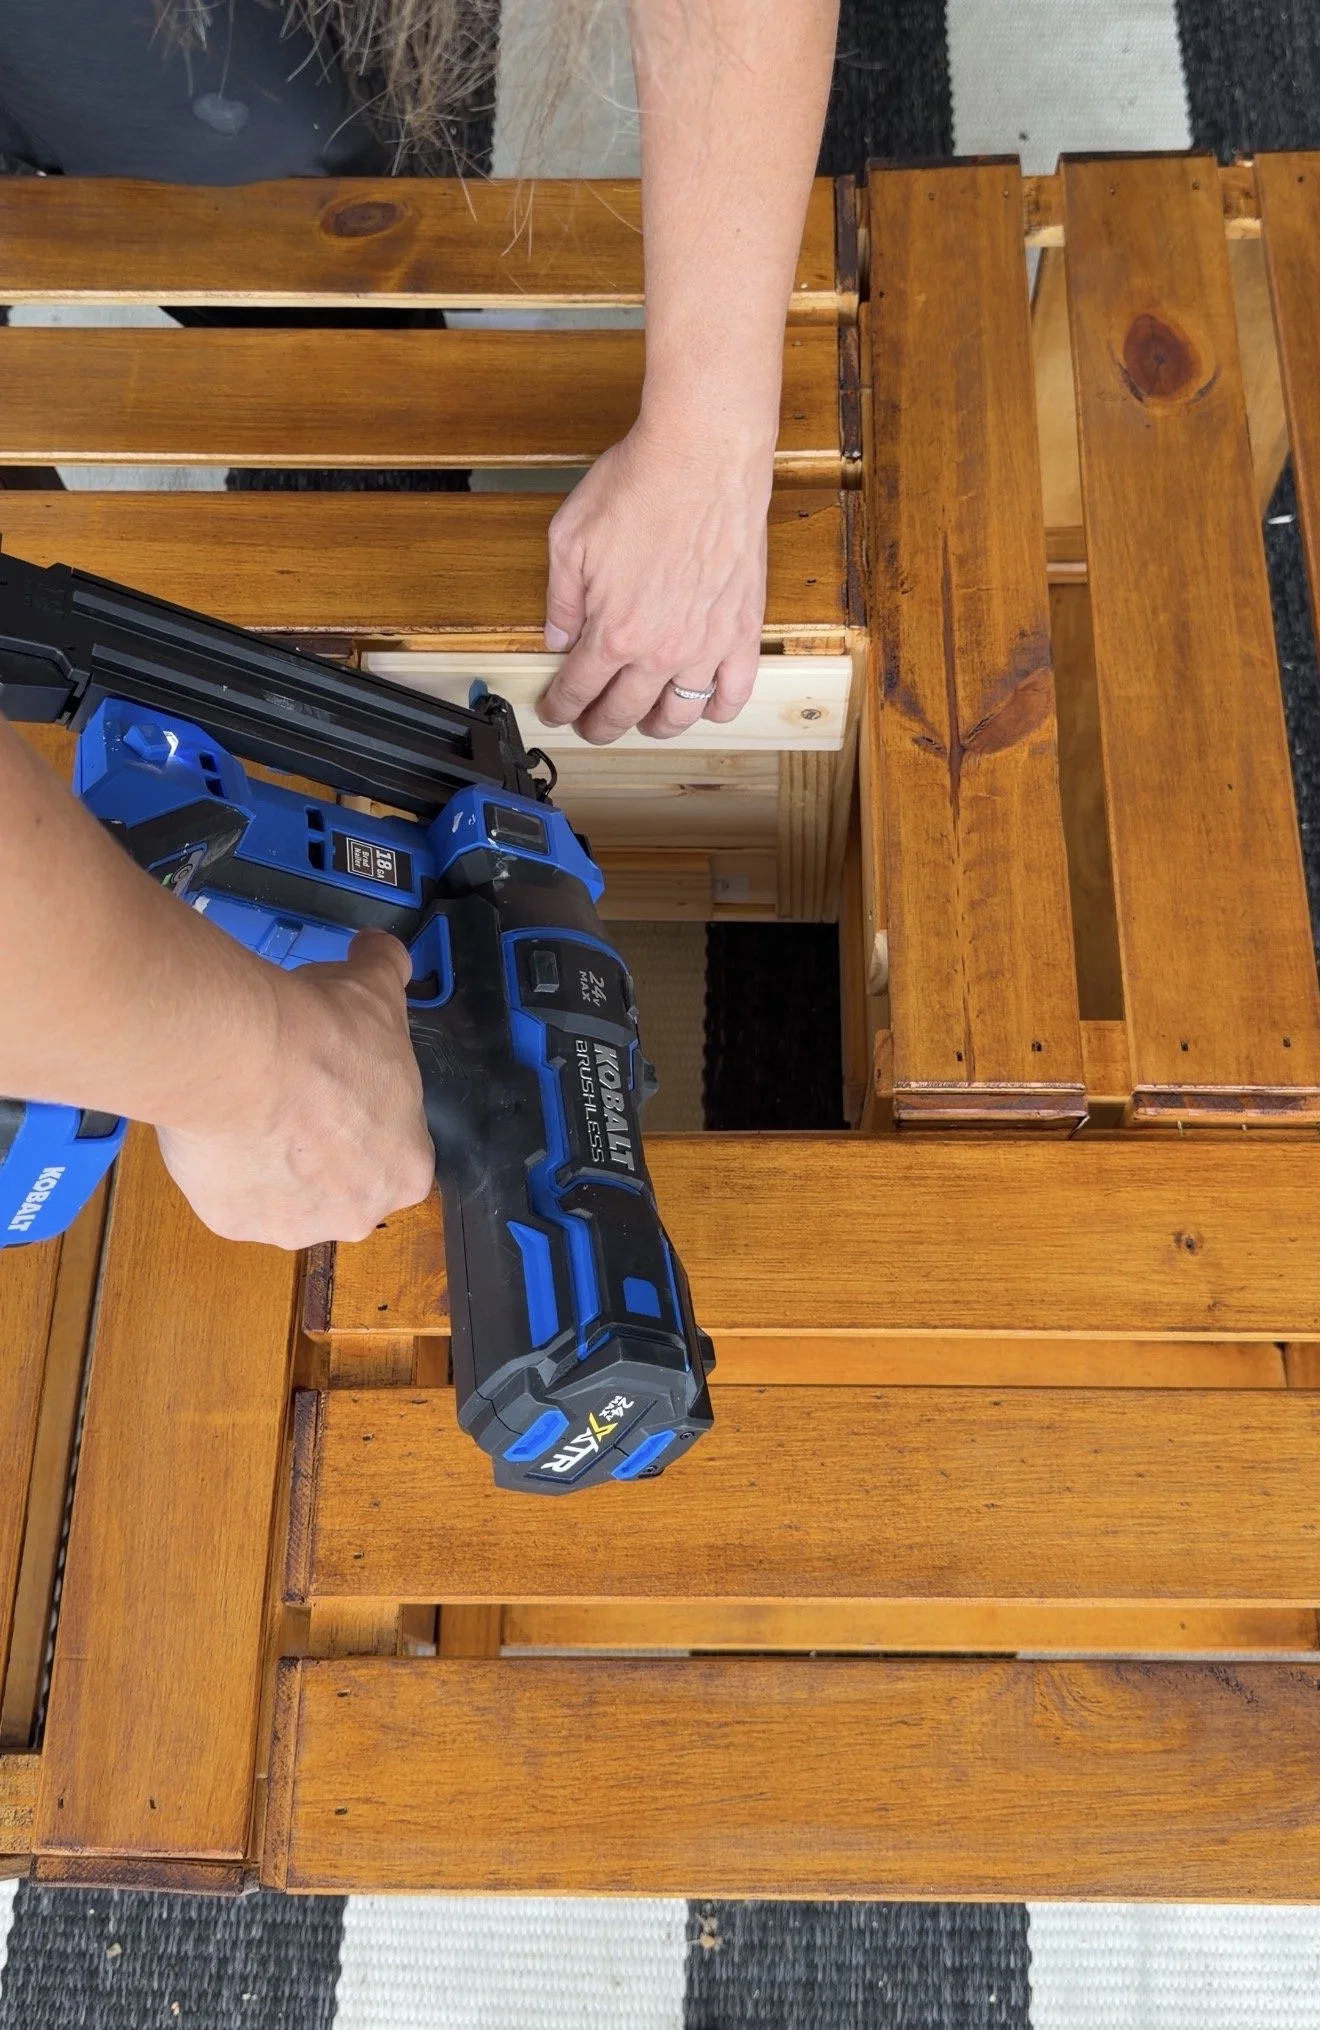
This is probably my favorite feature of the entire project!
Because of the pinwheel arrangement, the crates create a square opening in the middle of the table.
Rather than permanently closing that opening, I wanted to use it for something functional.
I cut four small pieces of scrap wood and attached them along the lower inside edges of the center opening using wood glue and brad nails.
These pieces create a support ledge for the planter containers.
Once installed, I stained the supports to match the rest of the table.
Then I found planter pots that could sit inside the opening.
Important: Measure your opening and check the dimensions of your pots before buying them. You want the containers to sit securely on the supports without falling through. For larger or heavier containers, reinforce the supports appropriately.
And just like that, the table has a built-in planter!
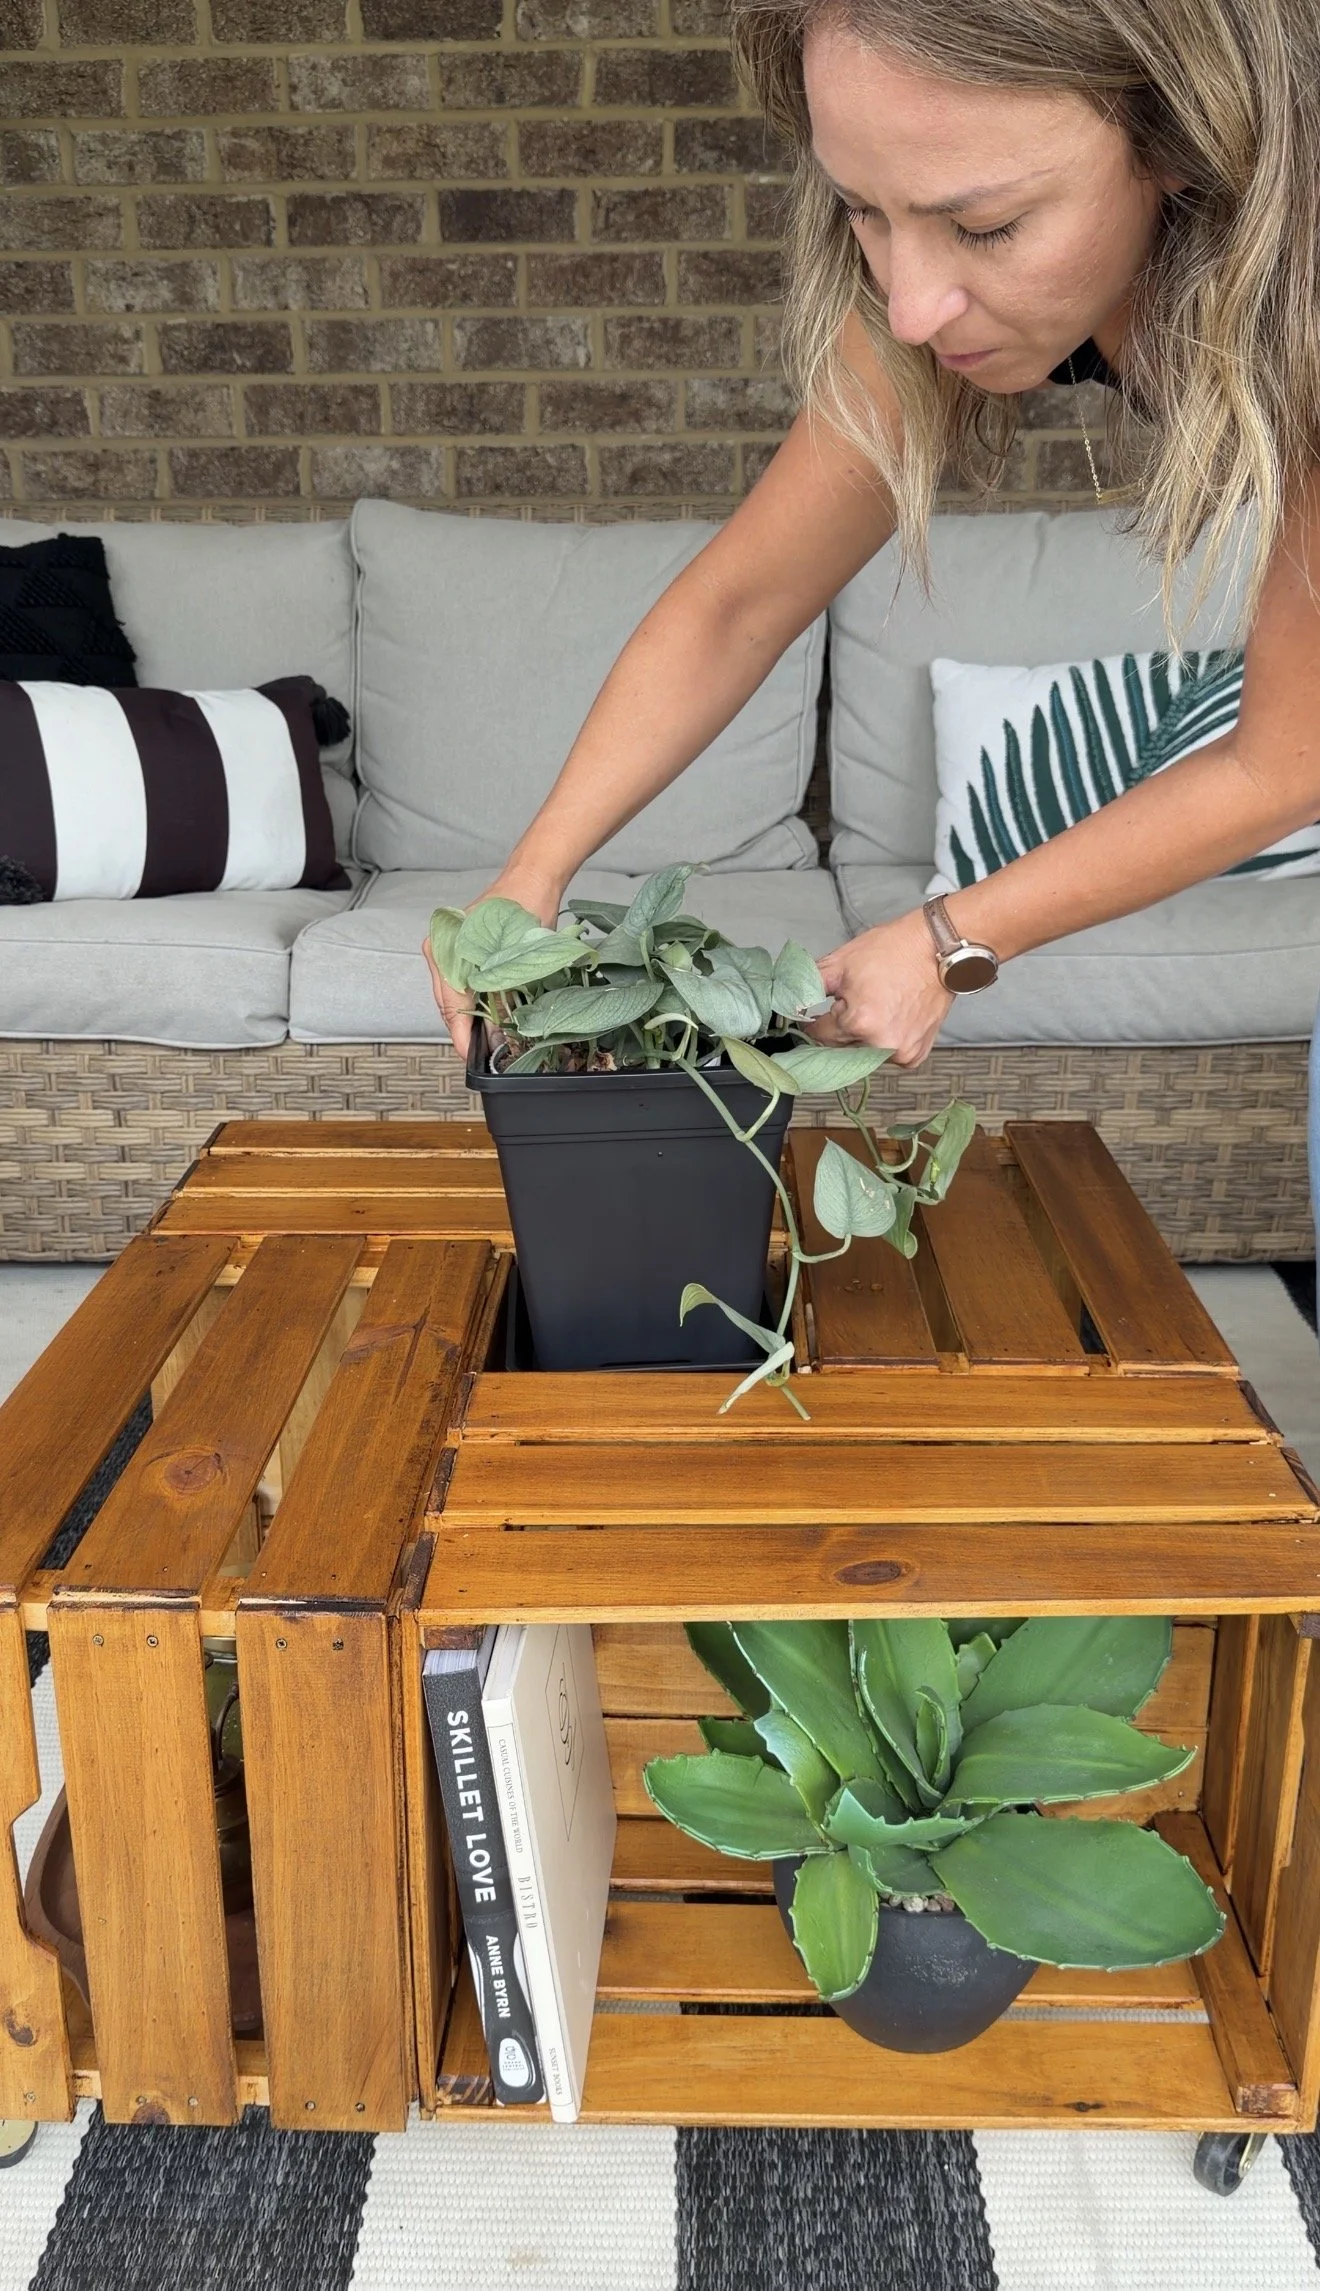
Three Ways to Style Your IKEA Crate Coffee Table
This is what makes this DIY more than just a coffee table.
1. Make It a Living Centerpiece
Add colorful flowers, fresh herbs, or small succulents to the center.
I love how this adds greenery directly to the table without taking up the space where you'd normally set drinks or snacks.
Just make sure your planters have appropriate drainage and protect the wood underneath from excess water.
2. Turn It Into a Drink Station
Hosting friends or family outside?
Swap the plants for a removable, watertight container and use the center to hold chilled drinks.
You could even use a removable bucket with ice for outdoor entertaining.
I'd avoid pouring ice or water directly into the wooden opening, since moisture can damage the crates over time.
3. Use the Outer Compartments for Storage
Don't forget about the four storage openings!
They're perfect for keeping items like outdoor games, lightweight patio blankets, or other things you want close by.
If you're leaving the table outdoors, remember to bring moisture-sensitive items inside when they're not in use.
Can You Customize the Size of This Table?
Absolutely, although the finished dimensions depend on the size of the crates you use.
That's why I recommend measuring your assembled crates before attaching anything.
You'll want to think about the overall table footprint, final height with the wheels, and the size of the square center opening.
DIY Coffee Table Calculator
Enter your crate measurements to plan your coffee table before building!
Assumes four identical rectangular crates arranged in a flush pinwheel pattern. Measurements are estimates. Verify fit, support, and hardware before building.
If you're using different crates or want to adapt this idea, planning those measurements ahead of time will save you a lot of frustration.
Is This IKEA Crate Coffee Table Worth Making?
If you're looking for a DIY outdoor coffee table that doesn't require complicated woodworking, I think this is such a fun option.
I love projects where you can take something ordinary and turn it into something that looks completely different.
And that's exactly what happened with these IKEA crates.
The built-in storage makes it practical, the wheels make it easy to move, and the interchangeable center gives you so many options for customizing it.
Plus, you can make the finished piece work with your own outdoor space and style.
If you decide to try this project, I'd love to see how yours turns out! Tag me @buildsbyashley so I can see your version.
Happy building!
Ashley | Builds by Ashley